How to Add GitHub Login to Your Cognito User Pool
In this example, we will look at how to add GitHub Login to Your Cognito User Pool using SST.
Requirements
- Node.js 16 or later
- We’ll be using TypeScript
- An AWS account with the AWS CLI configured locally
- A GitHub OAuth App
Create an SST app
 Let’s start by creating an SST app.
$ npx create-sst@latest --template=base/example api-oauth-github
$ cd api-oauth-github
$ npm install
By default, our app will be deployed to the us-east-1 AWS region. This can be changed in the sst.config.ts in your project root.
import { SSTConfig } from "sst";

export default {
  config(_input) {
    return {
      name: "api-oauth-github",
      region: "us-east-1",
    };
  },
} satisfies SSTConfig;
Project layout
An SST app is made up of two parts.
-
stacks/— App InfrastructureThe code that describes the infrastructure of your serverless app is placed in the
stacks/directory of your project. SST uses AWS CDK, to create the infrastructure. -
packages/functions/— App CodeThe code that’s run when your API is invoked is placed in the
packages/functions/directory of your project.
Setting up the Cognito
First, let’s create a Cognito User Pool to store the user info using the Cognito construct.
 Replace the
 stacks/ExampleStack.ts with the following.
import { StackContext, Api, Cognito, StaticSite } from "sst/constructs";
import * as cognito from "aws-cdk-lib/aws-cognito";

export function ExampleStack({ stack, app }: StackContext) {
  const auth = new Cognito(stack, "Auth", {
    cdk: {
      userPoolClient: {
        supportedIdentityProviders: [
          {
            name: "GitHub",
          },
        ],
        oAuth: {
          callbackUrls: [
            app.stage === "prod"
              ? "https://my-app.com"
              : "http://localhost:3000",
          ],
          logoutUrls: [
            app.stage === "prod"
              ? "https://my-app.com"
              : "https://localhost:3000",
          ],
        },
      },
    },
  });

  // Show the endpoint in the output
  stack.addOutputs({
    api_endpoint: api.url,
  });
}
This creates a Cognito User Pool; a user directory that manages users. We’ve configured the User Pool to allow users to login with their GitHub account and added the callback and logout URLs.
Note, we haven’t yet set up GitHub OAuth with our user pool, we’ll do it later.
Setting up the API
 Replace the
 Api definition with the following in stacks/ExampleStacks.ts.
// Create a HTTP API
const api = new Api(stack, "api", {
  authorizers: {
    userPool: {
      type: "user_pool",
      userPool: {
        id: auth.userPoolId,
        clientIds: [auth.userPoolClientId],
      },
    },
  },
  defaults: {
    authorizer: "none",
  },
  routes: {
    "GET /public": "packages/functions/src/public.handler",
    "GET /user": "packages/functions/src/user.handler",
    "POST /token": "packages/functions/src/token.handler",
    "GET /private": {
      function: "packages/functions/src/private.handler",
      authorizer: "userPool",
    },
  },
});

// Allow authenticated users invoke API
auth.attachPermissionsForAuthUsers(stack, [api]);
We are creating an API here using the Api construct. And we are adding four routes to it.
GET /public
POST /token
GET /user
GET /private
The GET /public is a public endpoint, The GET /private route have the authorization type JWT. This means the caller of the API needs to pass in a valid JWT token and the other two routes are proxy functions to handle GitHub OAuth responses.
Adding function code
Let’s create four functions, one handling the public route, one handling the private route and the other for the handling GitHub OAuth responses.
 Add a
Add a packages/functions/src/public.ts.
export async function handler() {
  return {
    statusCode: 200,
    body: "Hello, stranger!",
  };
}
 Add a
Add a packages/functions/src/private.ts.
export async function handler() {
  return {
    statusCode: 200,
    body: "Hello, user!",
  };
}
 Add a
Add a packages/token.ts.
Requesting data from the token endpoint, it will return the following form: access_token=xxxxxxxxxxxxxxxxxxxxxxx&token_type=bearer, which is not a JSON. It should be returning a JSON object for OpenID to understand. The below lambda does exactly that.
The idea for this endpoint is to take the form data sent from AWS Cognito, forward it back to GitHub with the header accept: application/json for GitHub API to return back in JSON form instead of query form.
import fetch from "node-fetch";
import parser from "lambda-multipart-parser";

import { APIGatewayProxyHandlerV2 } from "aws-lambda";

export const handler: APIGatewayProxyHandlerV2 = async (event) => {
  const result = await parser.parse(event);
  const token = await (
    await fetch(
      `https://github.com/login/oauth/access_token?client_id=${result.client_id}&client_secret=${result.client_secret}&code=${result.code}`,
      {
        method: "POST",
        headers: {
          accept: "application/json",
        },
      }
    )
  ).json();

  return token;
};
Make sure to install the node-fetch and lambda-multipart-parser packages.
 Run the below command in the
 packages/functions/ folder.
npm install node-fetch lambda-multipart-parser
 Add a
Add a packages/user.ts.
User info endpoint uses a different authorization scheme: Authorization: token OAUTH-TOKEN. But, OpenID will send a Bearer scheme so that’s we need a proxy to modify it to correct scheme.
The below lambda gets the Bearer token given by Cognito and modify the header to send token authorization scheme to GitHub and adds a sub field into the response for Cognito to map the username.
import fetch from "node-fetch";
import { APIGatewayProxyHandlerV2 } from "aws-lambda";

export const handler: APIGatewayProxyHandlerV2 = async (event) => {
  const token = await (
    await fetch("https://api.github.com/user", {
      method: "GET",
      headers: {
        authorization:
          "token " + event.headers["authorization"].split("Bearer ")[1],
        accept: "application/json",
      },
    })
  ).json();

  return {
    sub: token.id,
    ...token,
  };
};
Setting up GitHub OAuth
Now let’s add GitHub OAuth for our serverless app, to do so we need to create a GitHub User Pool OIDC IDP and link it with the user pool we created above.
 Create a
 .env file in the root and add your GitHub GITHUB_CLIENT_ID and GITHUB_CLIENT_SECRET from your GitHub OAuth App.
Note, if you haven’t created a GitHub OAuth app, follow this tutorial.
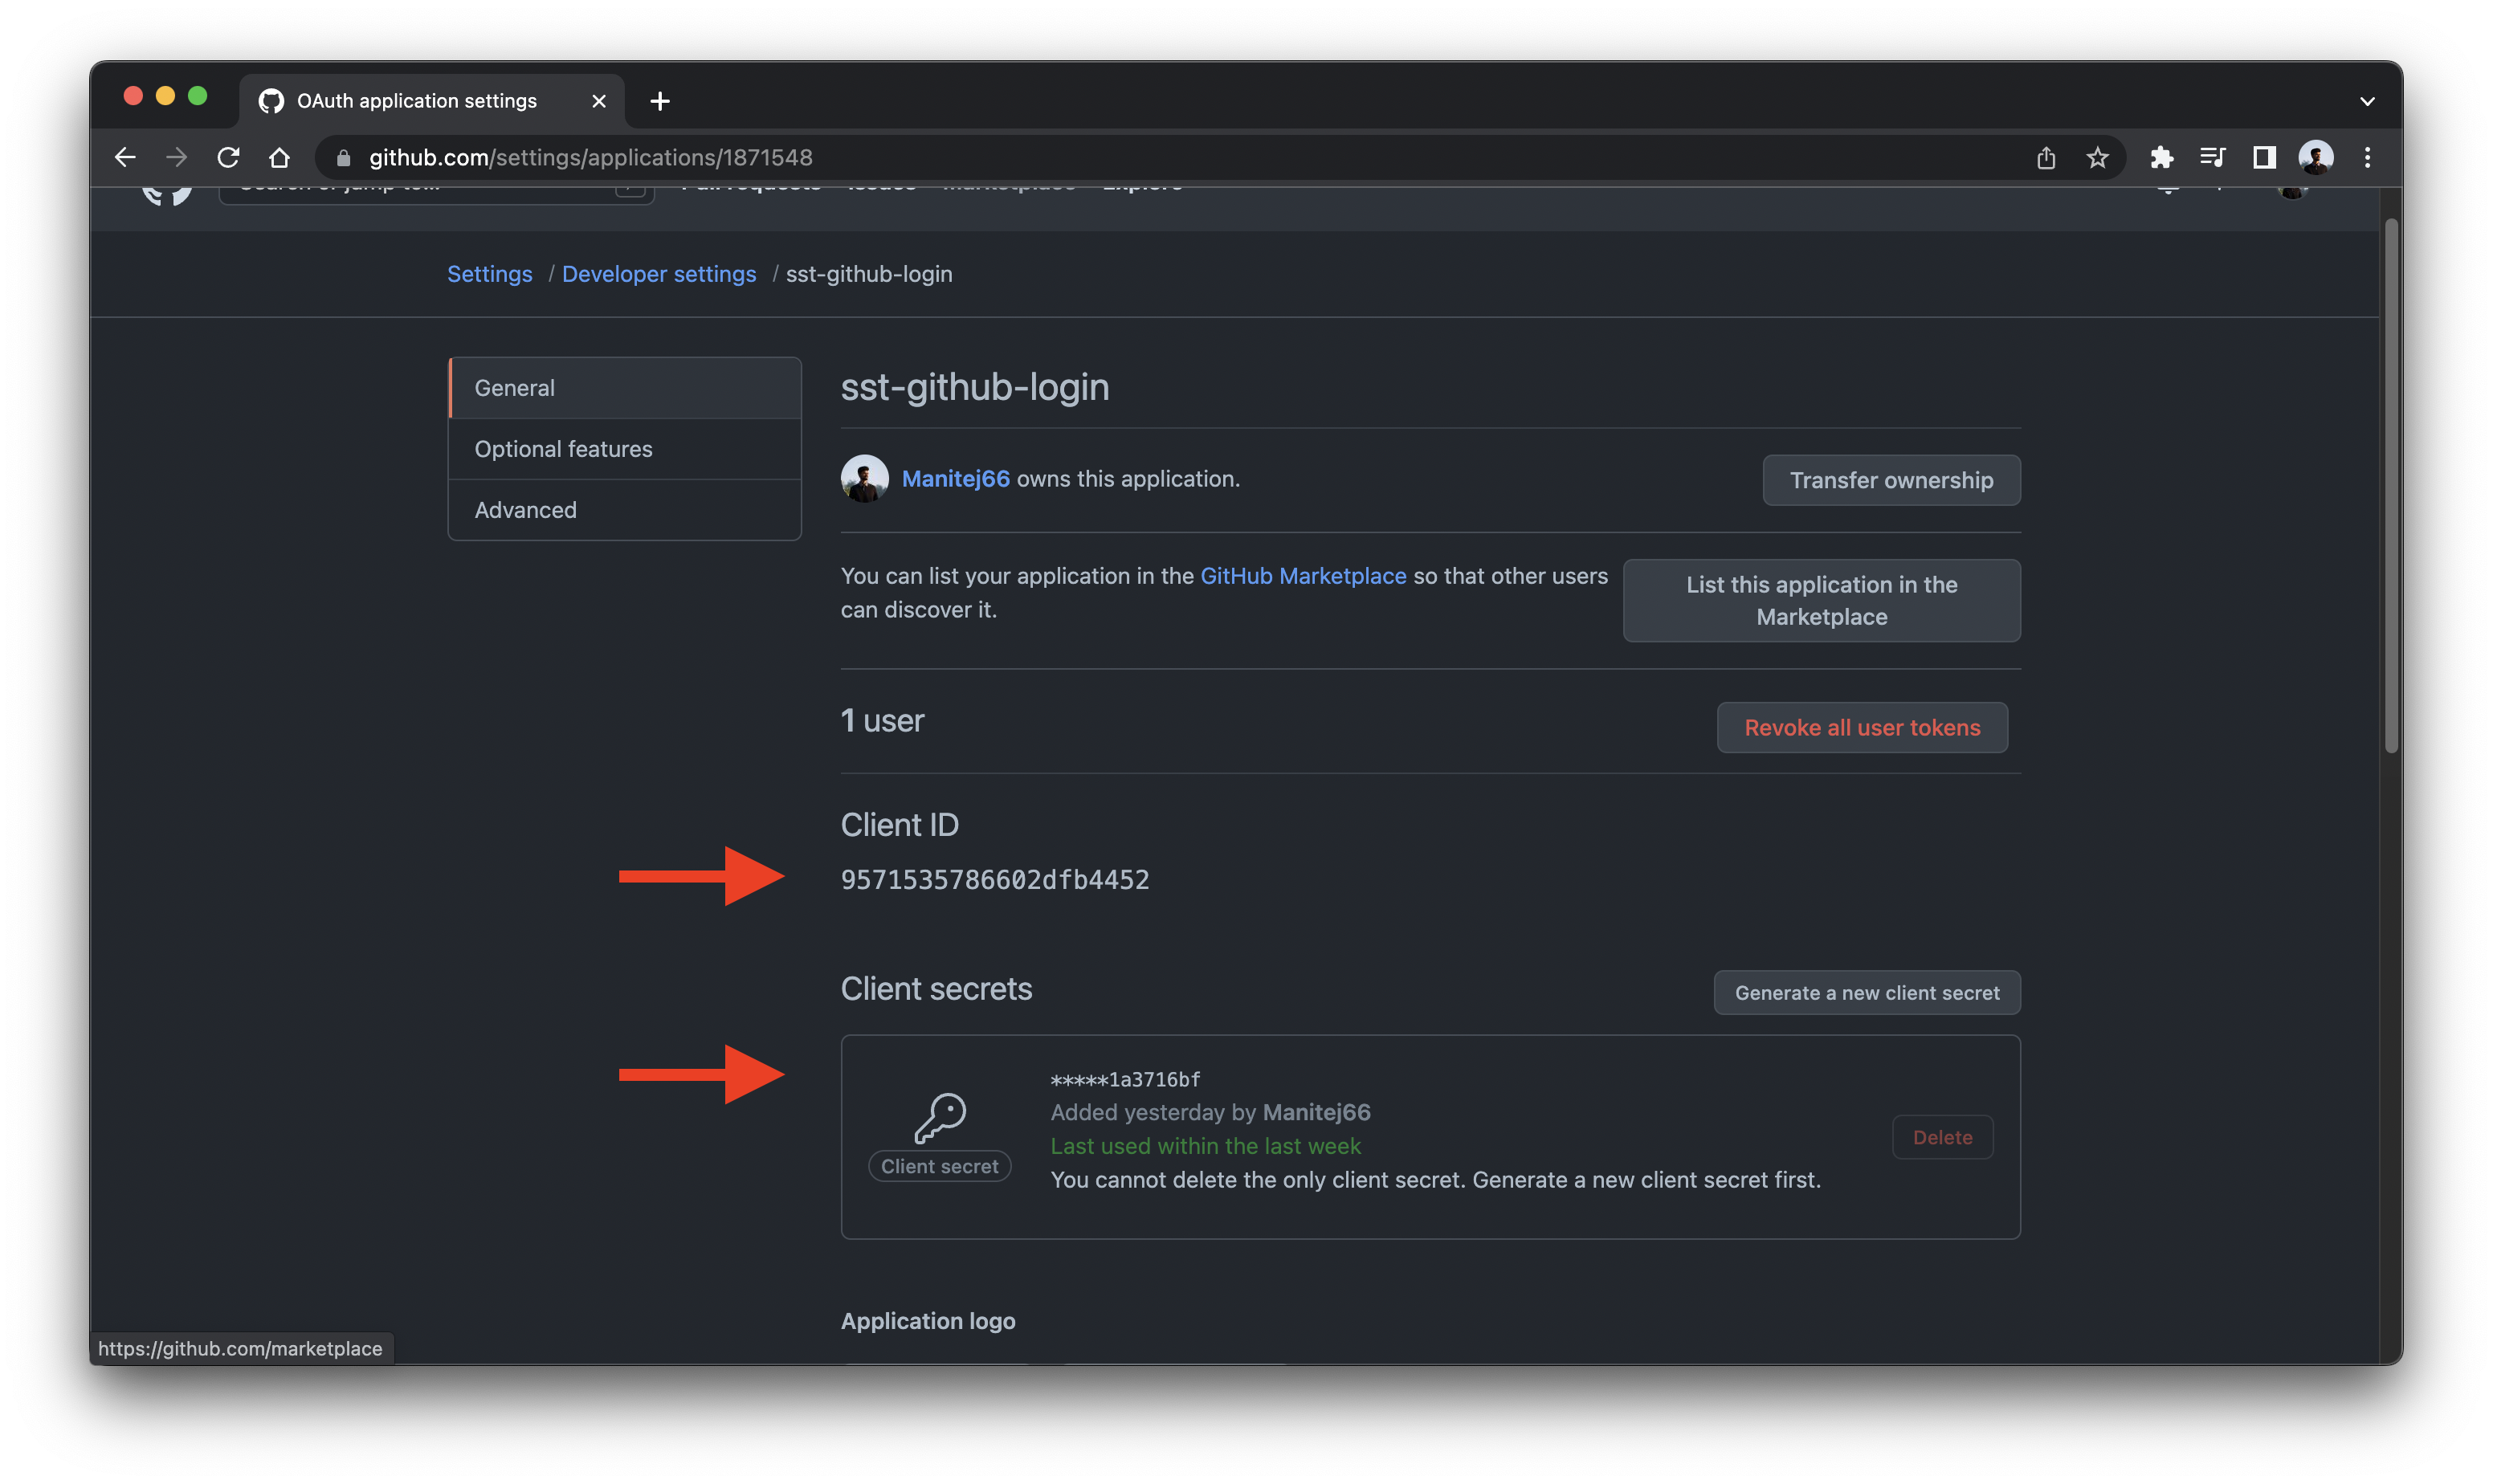
GITHUB_CLIENT_ID=<YOUR_GITHUB_CLIENT_ID>
GITHUB_CLIENT_SECRET=<YOUR_GITHUB_CLIENT_SECRET>
 Add this below the
 Auth definition in stacks/ExampleStack.ts.
// Throw error if client ID & secret are not provided
if (!process.env.GITHUB_CLIENT_ID || !process.env.GITHUB_CLIENT_SECRET)
  throw new Error("Please set GITHUB_CLIENT_ID and GITHUB_CLIENT_SECRET");

// Create a GitHub OIDC IDP
const idp = new cognito.CfnUserPoolIdentityProvider(
  stack,
  "GitHubIdentityProvider",
  {
    providerName: "GitHub",
    providerType: "OIDC",
    userPoolId: auth.userPoolId,
    providerDetails: {
      client_id: process.env.GITHUB_CLIENT_ID,
      client_secret: process.env.GITHUB_CLIENT_SECRET,
      attributes_request_method: "GET",
      oidc_issuer: "https://github.com",
      authorize_scopes: "openid user",
      authorize_url: "https://github.com/login/oauth/authorize",
      token_url: api.url + "/token",
      attributes_url: api.url + "/user",
      jwks_uri: api.url + "/token",
    },
    attributeMapping: {
      email: "email",
      name: "name",
      picture: "avatar_url",
    },
  }
);

// attach the IDP to the client
if (idp) {
  auth.cdk.userPoolClient.node.addDependency(idp);
}
This creates a GitHub OIDC provider with the given scopes and links the created provider to our user pool and GitHub user’s attributes will be mapped to the User Pool user.
Now let’s associate a Cognito domain to the user pool, which can be used for sign-up and sign-in webpages.
 Add below code in
 stacks/ExampleStack.ts.
// Create a cognito userpool domain
const domain = auth.cdk.userPool.addDomain("AuthDomain", {
  cognitoDomain: {
    domainPrefix: `${app.stage}-github-demo-oauth`,
  },
});
Note, the domainPrefix need to be globally unique across all AWS accounts in a region.
Setting up our React app
To deploy a React app to AWS, we’ll be using the SST StaticSite construct.
 Replace the
 stack.addOutputs call with the following.
// Create a React Static Site
const site = new StaticSite(stack, "Site", {
  path: "packages/frontend",
  buildOutput: "dist",
  buildCommand: "npm run build",
  environment: {
    VITE_APP_COGNITO_DOMAIN: domain.domainName,
    VITE_APP_STAGE: app.stage,
    VITE_APP_API_URL: api.url,
    VITE_APP_REGION: app.region,
    VITE_APP_USER_POOL_ID: auth.userPoolId,
    VITE_APP_IDENTITY_POOL_ID: auth.cognitoIdentityPoolId,
    VITE_APP_USER_POOL_CLIENT_ID: auth.userPoolClientId,
  },
});

// Show the endpoint in the output
stack.addOutputs({
  api_endpoint: api.url,
  auth_client_id: auth.userPoolClientId,
  domain: domain.domainName,
  site_url: site.url,
});
The construct is pointing to where our React.js app is located. We haven’t created our app yet but for now, we’ll point to the packages/frontend directory.
We are also setting up build time React environment variables with the endpoint of our API. The StaticSite allows us to set environment variables automatically from our backend, without having to hard code them in our frontend.
We are going to print out the resources that we created for reference.
Creating the frontend
Run the below commands in the packages/ directory to create a basic react project.
$ npx create-vite@latest frontend --template react
$ cd frontend
$ npm install
This sets up our React app in the packages/frontend/ directory. Recall that, earlier in the guide we were pointing the StaticSite construct to this path.
We also need to load the environment variables from our SST app. To do this, we’ll be using the sst bind command.
 Replace the
 dev script in your frontend/package.json.
"dev": "vite"
 With the following:
"dev": "sst bind vite"
Starting your dev environment
 SST features a Live Lambda Development environment that allows you to work on your serverless apps live.
$ npm run dev
The first time you run this command it’ll take a couple of minutes to deploy your app and a debug stack to power the Live Lambda Development environment.
===============
 Deploying app
===============

Preparing your SST app
Transpiling source
Linting source
Deploying stacks
dev-api-oauth-github-ExampleStack: deploying...

 ✅  dev-api-oauth-github-ExampleStack


Stack dev-api-oauth-github-ExampleStack
  Status: deployed
  Outputs:
    api_url: https://v0l1zlpy5f.execute-api.us-east-1.amazonaws.com
    auth_client_id: 253t1t5o6jjur88nu4t891eac2
    auth_domain: dev-demo-auth-domain
    site_url: https://d1567f41smqk8b.cloudfront.net
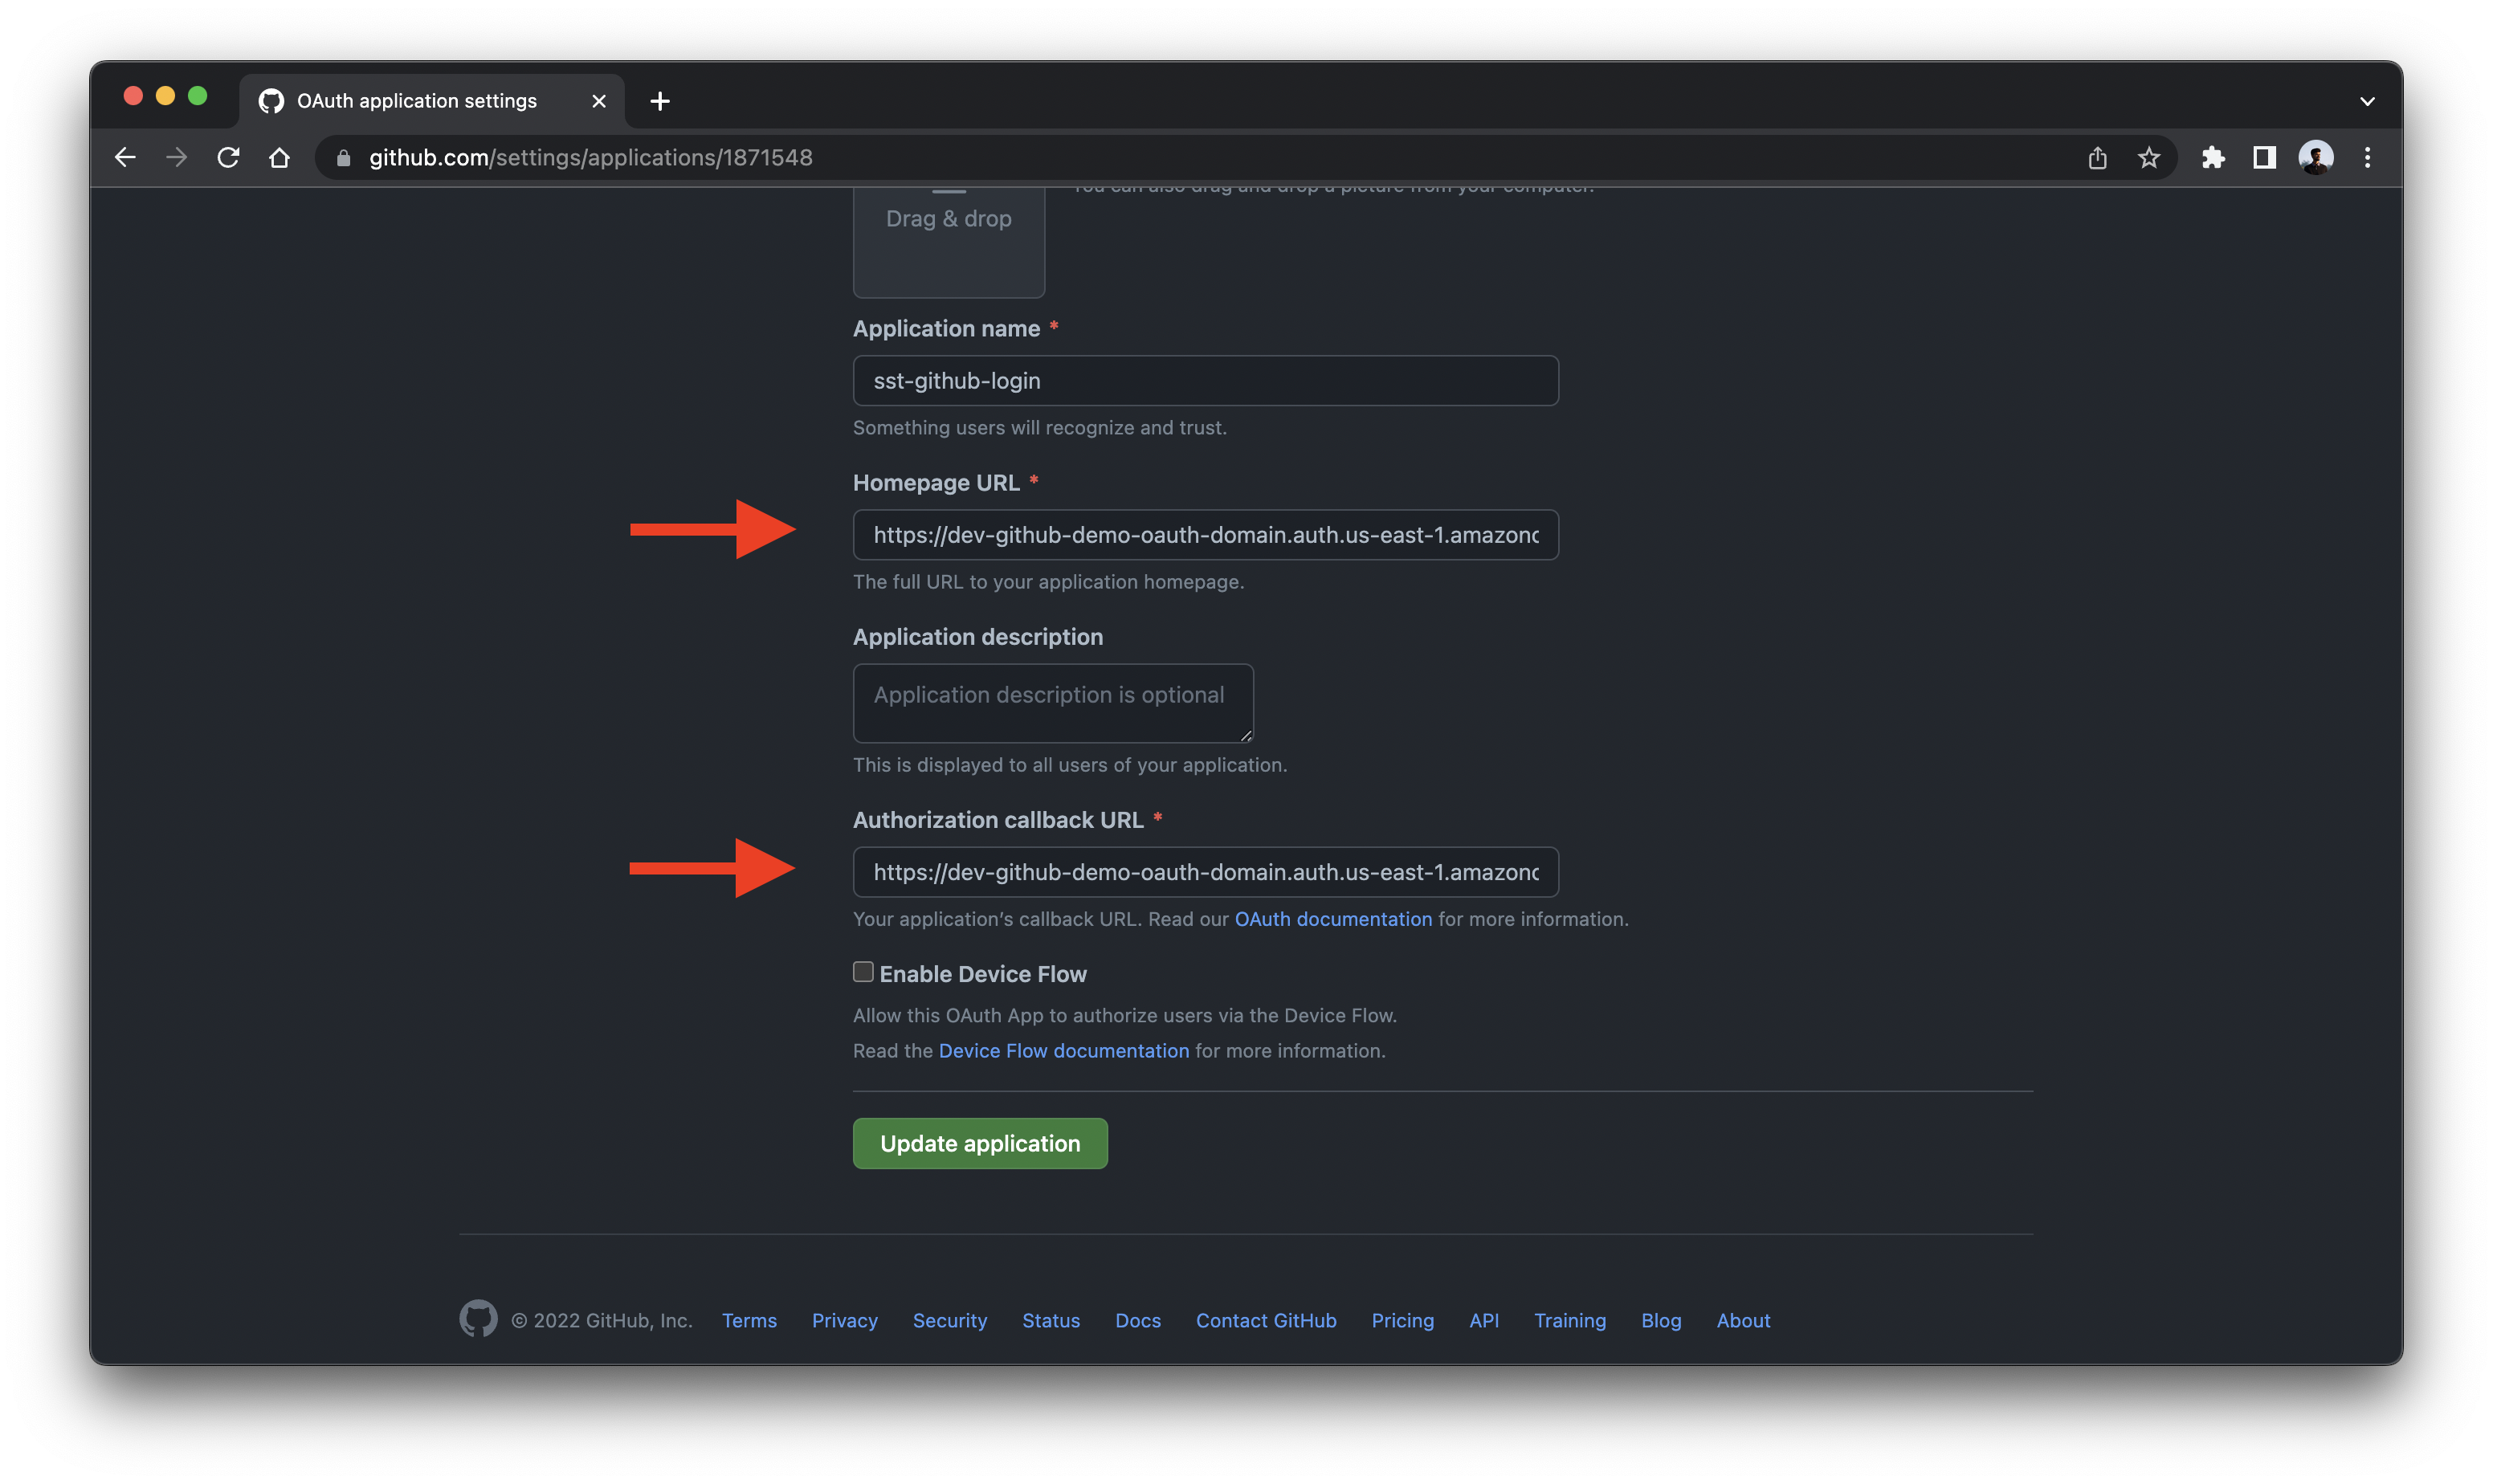
Copy the cognito domain from the terminal output and add it to the Authorised JavaScript origins in the GitHub OAuth page.
Note, if you are not using custom domain, your domain URL will be https://<domain>.auth.<region>.amazoncognito.com.
And under Authorised redirect URIs, append /oauth2/idpresponse to your domain URL and add it to the values and click Update application.
The api_endpoint is the API we just created. While the site_url is where our React app will be hosted. For now, it’s just a placeholder website.
Let’s test our endpoint with the SST Console. The SST Console is a web based dashboard to manage your SST apps. Learn more about it in our docs.
Go to the API tab and click Send button of the GET /public to send a GET request.
Note, The API explorer lets you make HTTP requests to any of the routes in your Api construct. Set the headers, query params, request body, and view the function logs with the response.
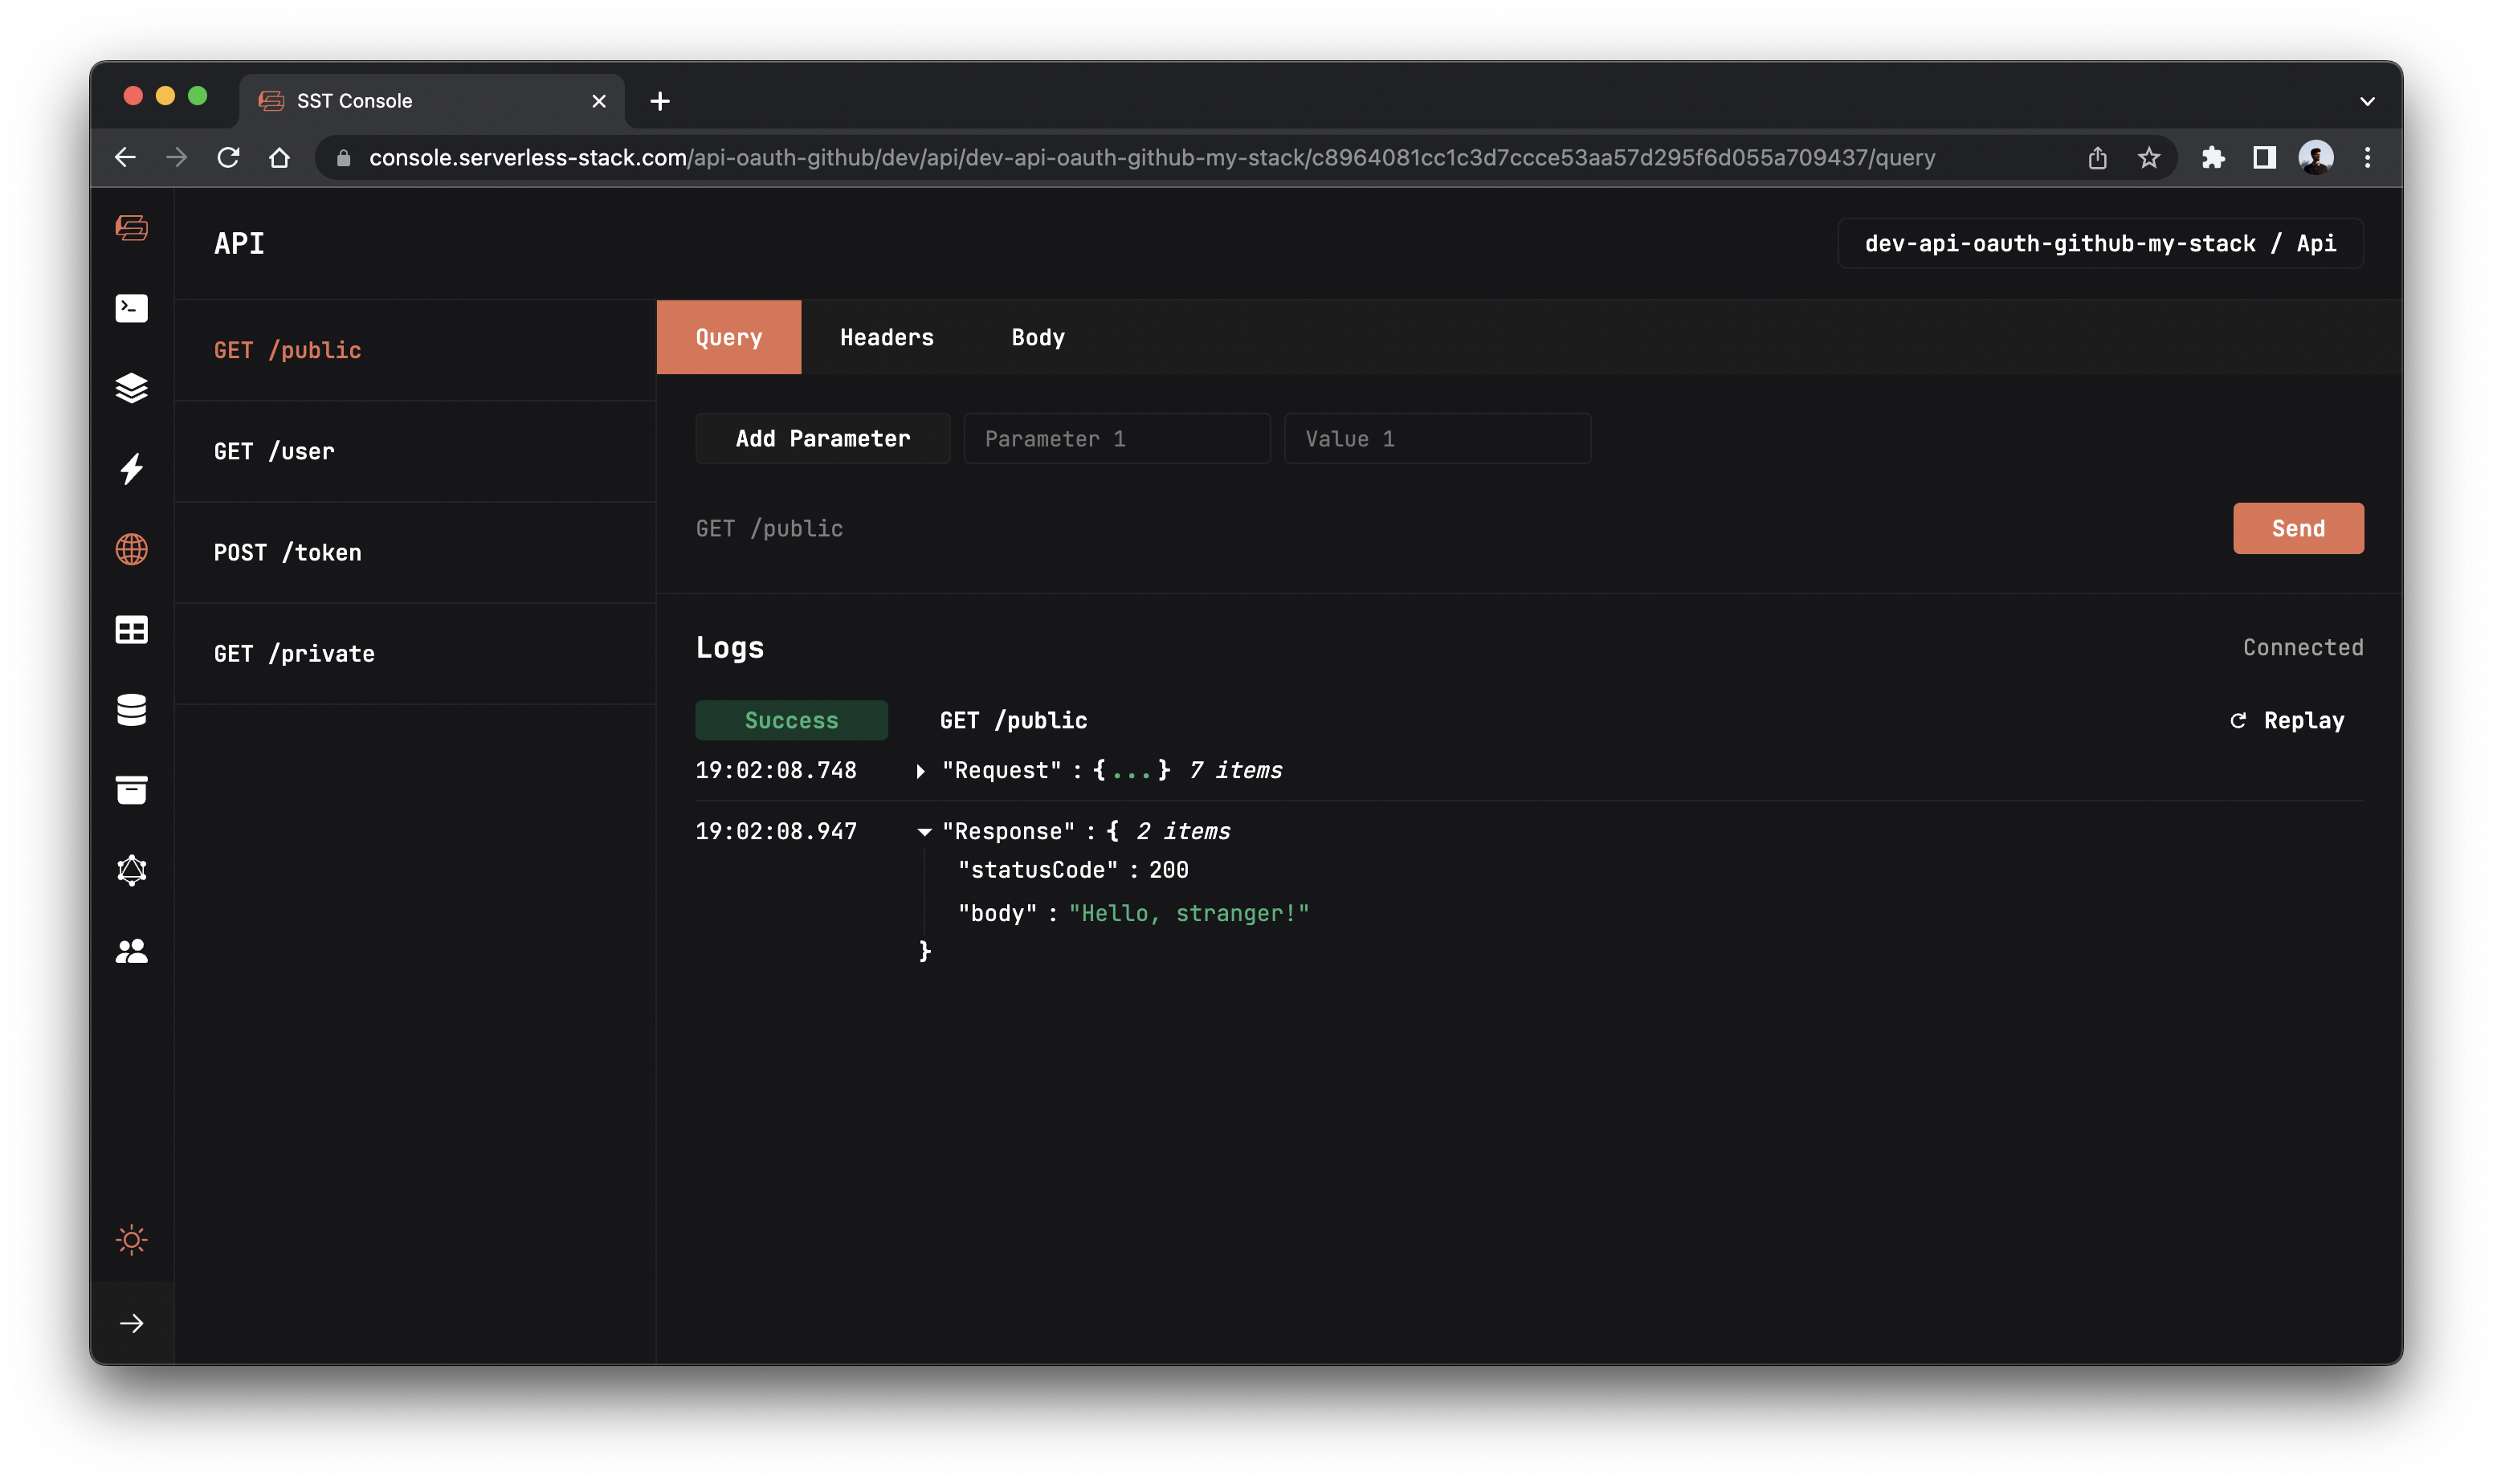
You should see a Hello, stranger! in the response body.
Adding AWS Amplify
To use our AWS resources on the frontend we are going to use AWS Amplify.
Note, to know more about configuring Amplify with SST check this chapter.
Run the below command to install AWS Amplify in the packages/frontend/ directory.
npm install aws-amplify
 Replace
 frontend/src/main.jsx with below code.
/* eslint-disable no-undef */
import React from "react";
import ReactDOM from "react-dom";
import "./index.css";
import App from "./App";
import Amplify from "aws-amplify";

Amplify.configure({
  Auth: {
    region: import.meta.env.VITE_APP_REGION,
    userPoolId: import.meta.env.VITE_APP_USER_POOL_ID,
    userPoolWebClientId: import.meta.env.VITE_APP_USER_POOL_CLIENT_ID,
    mandatorySignIn: false,
    oauth: {
      domain: `${
        import.meta.env.VITE_APP_COGNITO_DOMAIN +
        ".auth." +
        import.meta.env.VITE_APP_REGION +
        ".amazoncognito.com"
      }`,
      scope: ["email", "profile", "openid", "aws.cognito.signin.user.admin"],
      redirectSignIn:
        import.meta.env.VITE_APP_STAGE === "prod"
          ? "production-url"
          : "http://localhost:3000", // Make sure to use the exact URL
      redirectSignOut:
        import.meta.env.VITE_APP_STAGE === "prod"
          ? "production-url"
          : "http://localhost:3000", // Make sure to use the exact URL
      responseType: "token",
    },
  },
  API: {
    endpoints: [
      {
        name: "api",
        endpoint: import.meta.env.VITE_APP_API_URL,
        region: import.meta.env.VITE_APP_REGION,
      },
    ],
  },
});

ReactDOM.render(
  <React.StrictMode>
    <App />
  </React.StrictMode>,
  document.getElementById("root")
);
Adding login UI
 Replace
 frontend/src/App.jsx with below code.
import React, { useState, useEffect } from "react";
import { Auth, API } from "aws-amplify";

const App = () => {
  const [user, setUser] = useState(null);
  const [loading, setLoading] = useState(true);

  const getUser = async () => {
    const user = await Auth.currentUserInfo();
    console.log(user);
    if (user) setUser(user);
    setLoading(false);
  };

  const signIn = async () =>
    await Auth.federatedSignIn({
      provider: "GitHub",
    });

  const signOut = async () => await Auth.signOut();

  const publicRequest = async () => {
    const response = await API.get("api", "/public");
    alert(JSON.stringify(response));
  };

  const privateRequest = async () => {
    try {
      const response = await API.get("api", "/private", {
        headers: {
          Authorization: `Bearer ${(await Auth.currentSession())
            .getAccessToken()
            .getJwtToken()}`,
        },
      });
      alert(JSON.stringify(response));
    } catch (error) {
      alert(error);
    }
  };

  useEffect(() => {
    getUser();
  }, []);

  if (loading) return <div className="container">Loading...</div>;

  return (
    <div className="container">
      <h2>SST + Cognito + GitHub OAuth + React</h2>
      {user ? (
        <div className="profile">
          <p>Welcome {user.attributes.name}!</p>
          <img
            src={user.attributes.picture}
            style={{ borderRadius: "50%" }}
            width={100}
            height={100}
            alt=""
          />
          <p>{user.attributes.email}</p>
          <button onClick={signOut}>logout</button>
        </div>
      ) : (
        <div>
          <p>Not signed in</p>
          <button onClick={signIn}>login</button>
        </div>
      )}
      <div className="api-section">
        <button onClick={publicRequest}>call /public</button>
        <button onClick={privateRequest}>call /private</button>
      </div>
    </div>
  );
};

export default App;
 Replace
 frontend/src/index.css with the below styles.
body {
  margin: 0;
  font-family: -apple-system, BlinkMacSystemFont, "Segoe UI", "Roboto",
    "Oxygen", "Ubuntu", "Cantarell", "Fira Sans", "Droid Sans",
    "Helvetica Neue", sans-serif;
  -webkit-font-smoothing: antialiased;
  -moz-osx-font-smoothing: grayscale;
}

code {
  font-family: source-code-pro, Menlo, Monaco, Consolas, "Courier New",
    monospace;
}

.container {
  width: 100%;
  height: 100vh;
  display: flex;
  flex-direction: column;
  align-items: center;
  text-align: center;
}

button {
  width: 120px;
  padding: 10px;
  border: none;
  border-radius: 4px;
  background-color: #000;
  color: #fff;
  font-size: 16px;
  cursor: pointer;
}

.profile {
  border: 1px solid #ccc;
  padding: 20px;
  border-radius: 4px;
}
.api-section {
  width: 100%;
  margin-top: 20px;
  display: flex;
  justify-content: center;
  align-items: center;
  gap: 10px;
}

.api-section > button {
  background-color: darkorange;
}
Let’s start our frontend in development environment.
 In the
 packages/frontend/ directory run.
npm run dev
Open up your browser and go to http://localhost:3000.
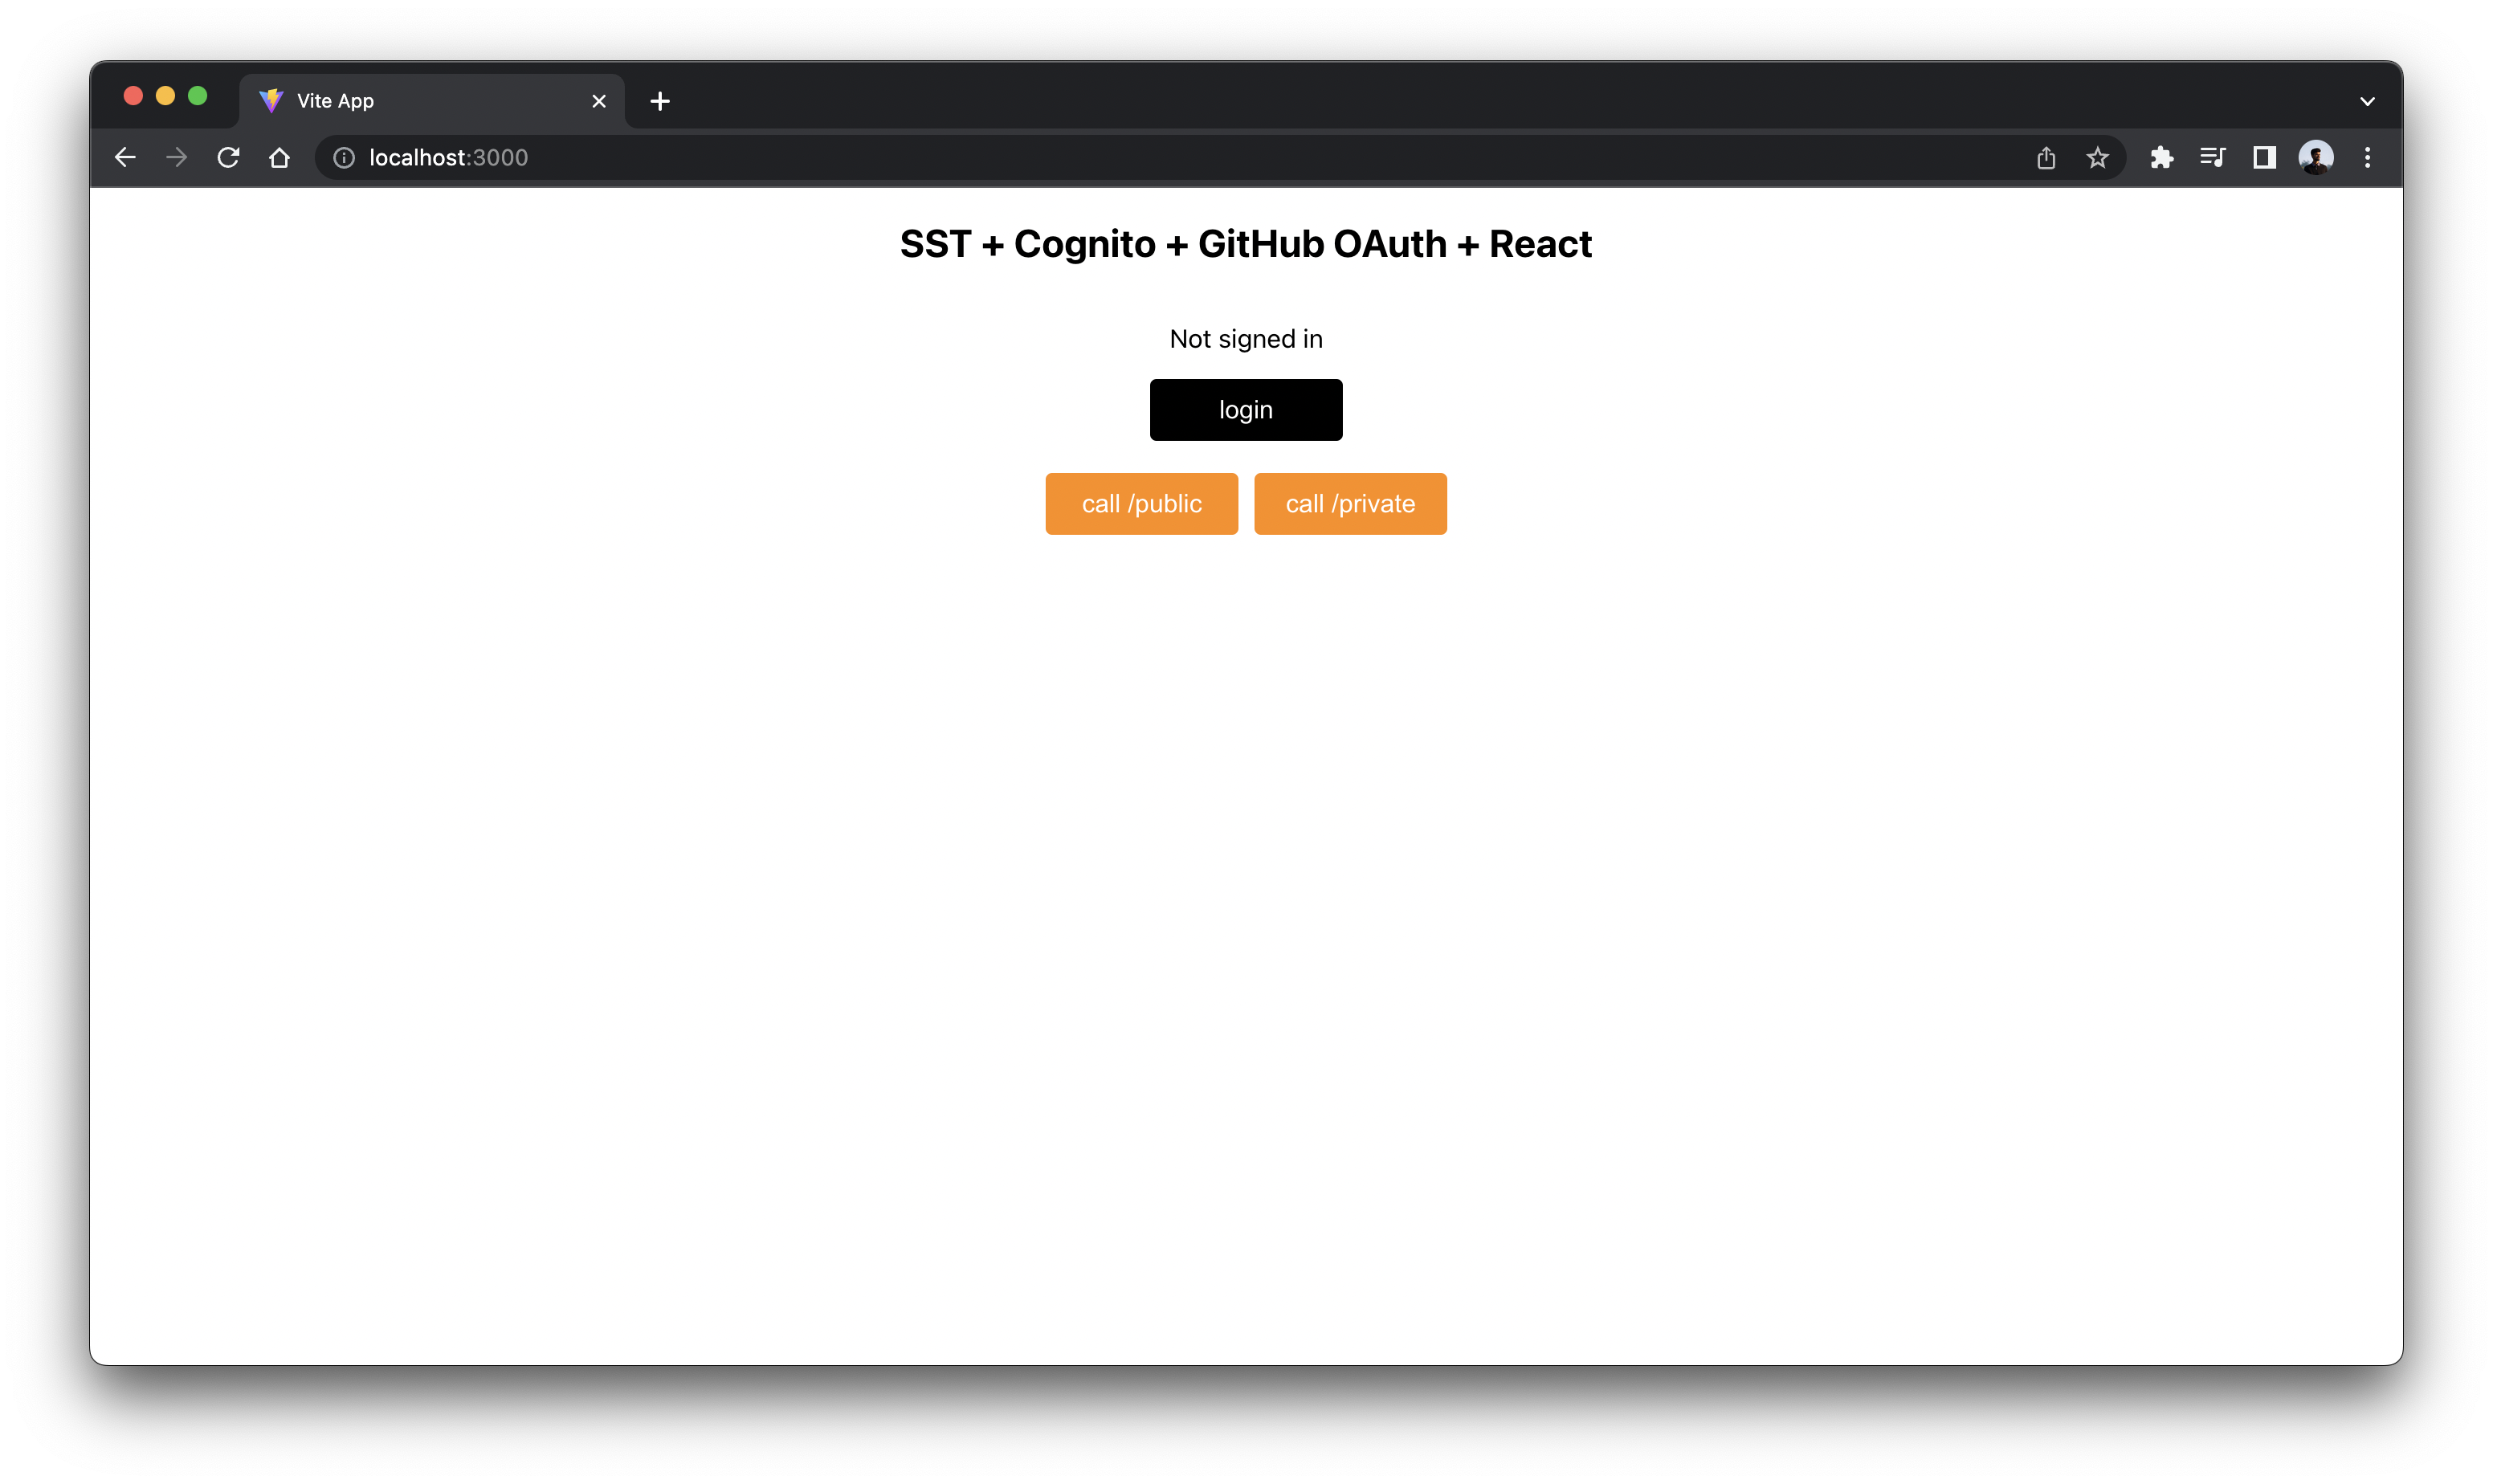
There are 2 buttons that invokes the endpoints we created above.
The call /public button invokes GET /public route using the publicRequest method we created in our frontend.
Similarly, the call /private button invokes GET /private route using the privateRequest method.
When you’re not logged in and try to click the buttons, you’ll see responses like below.
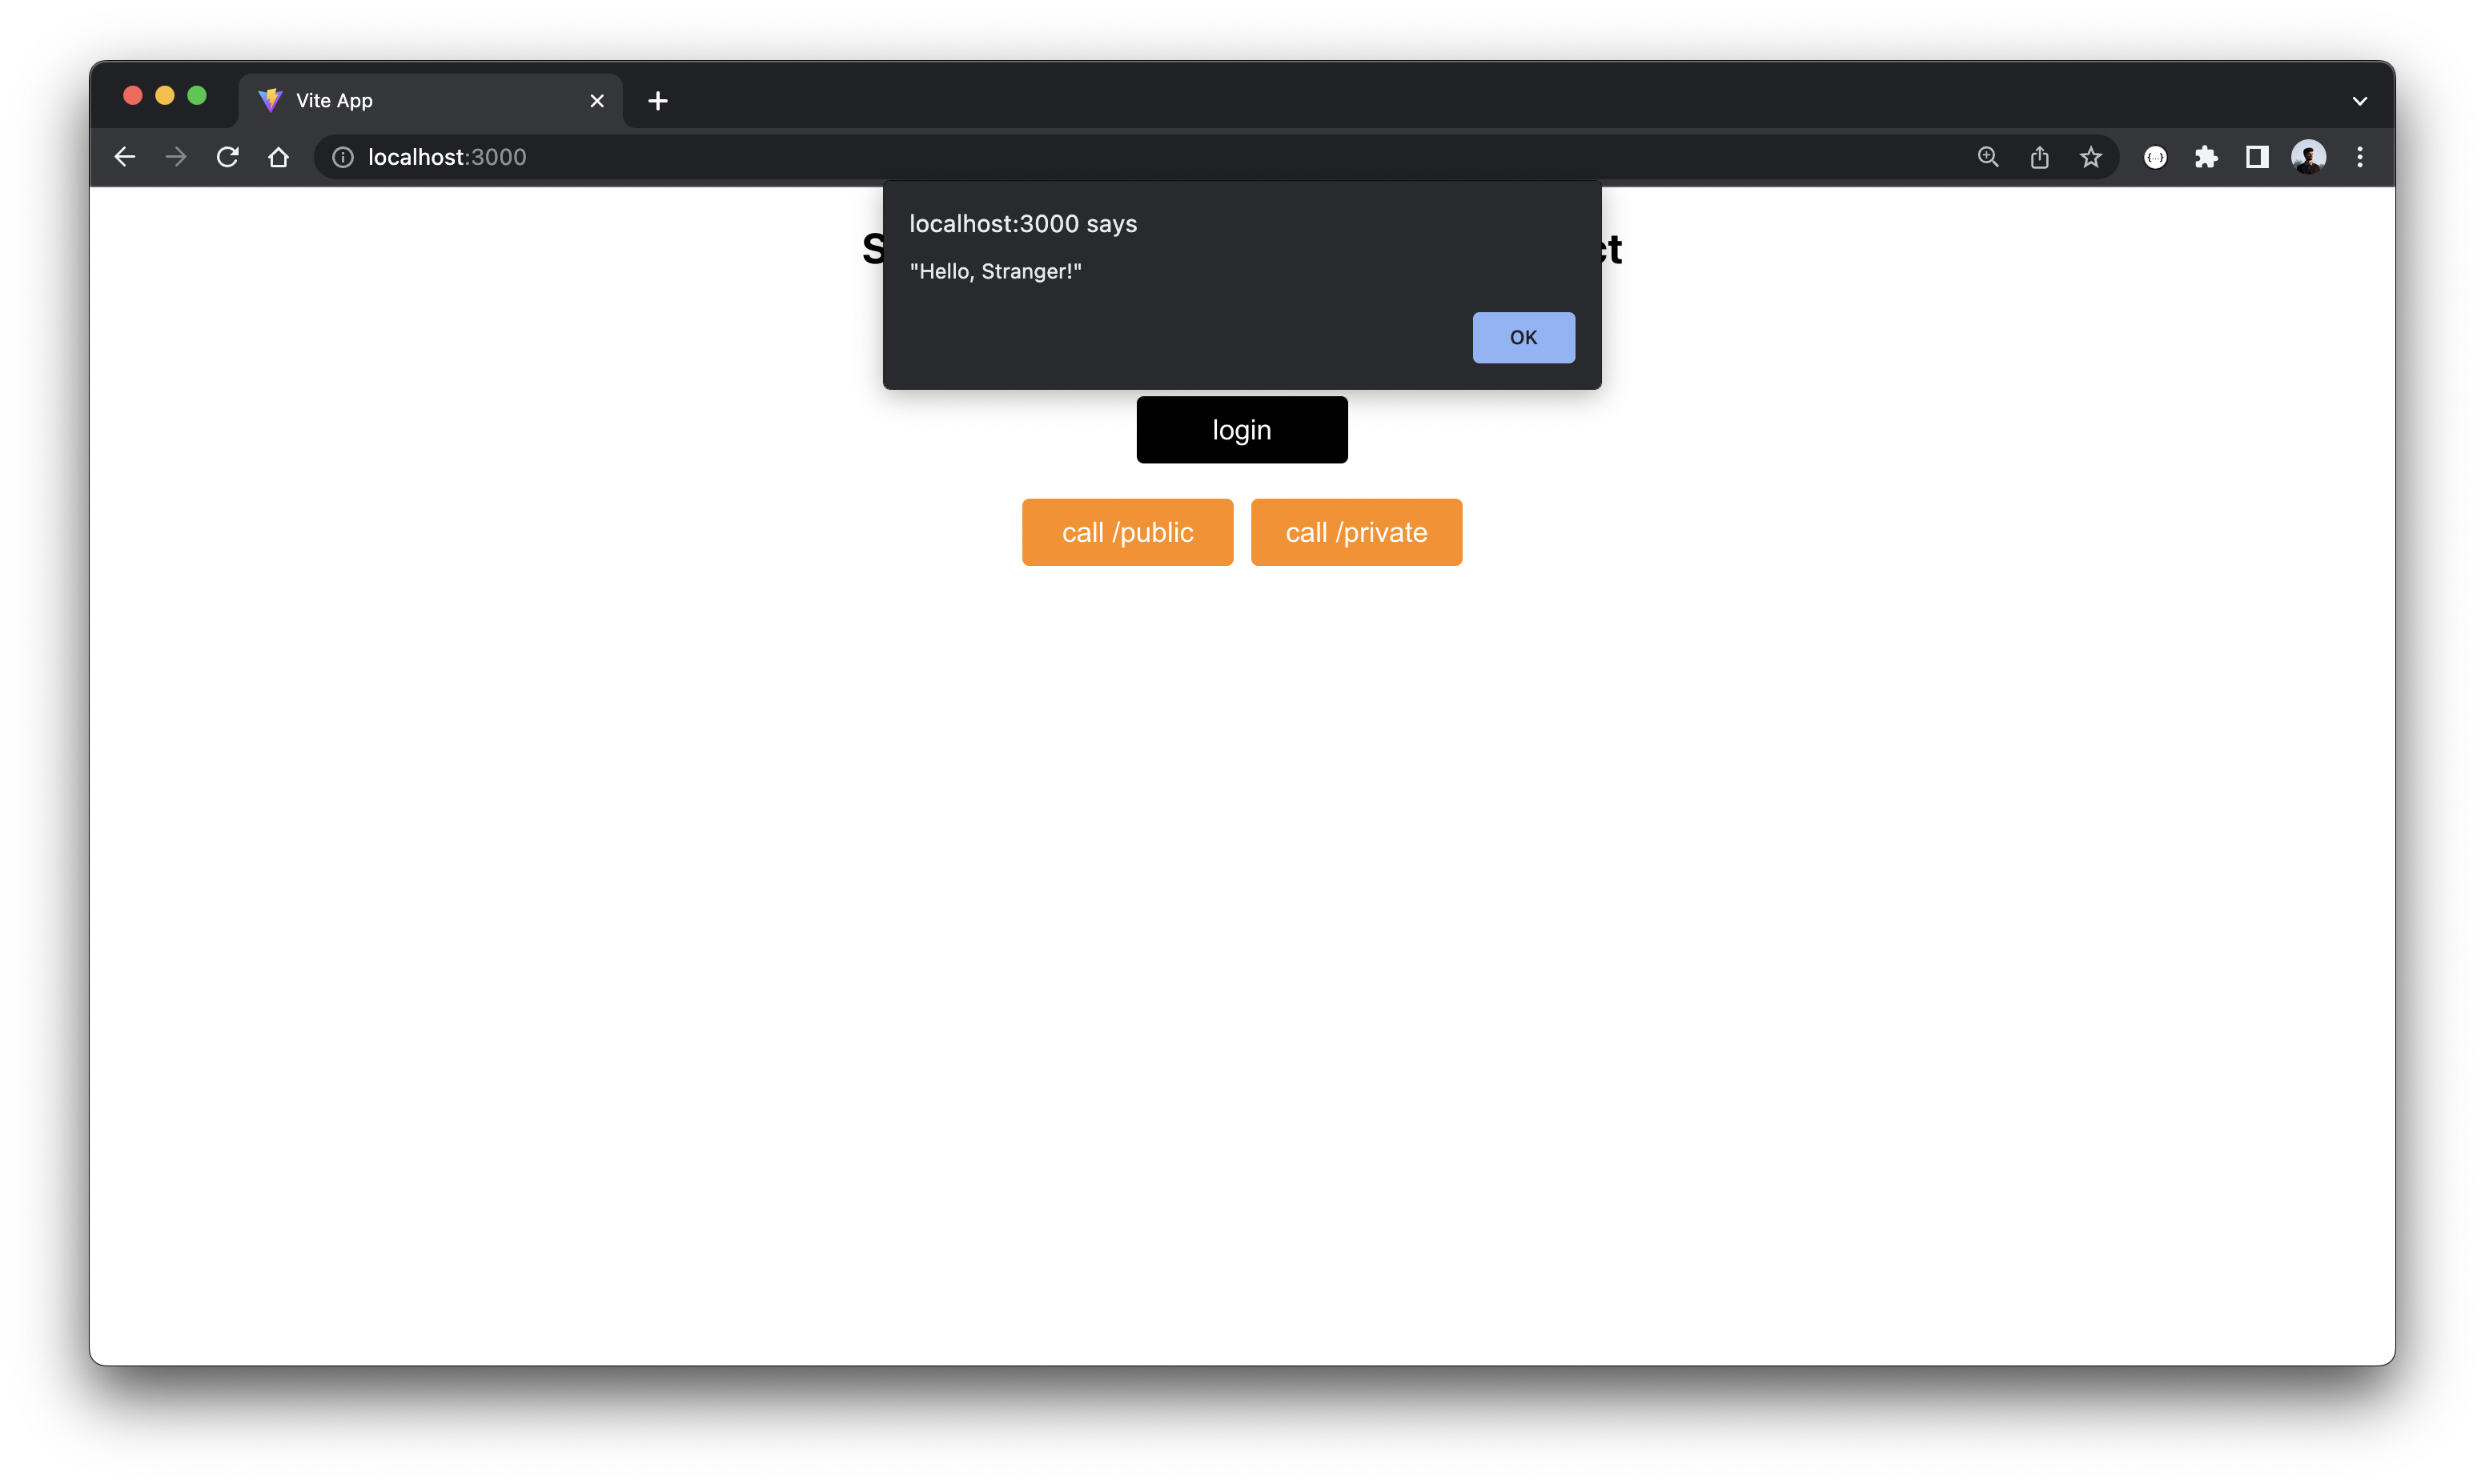
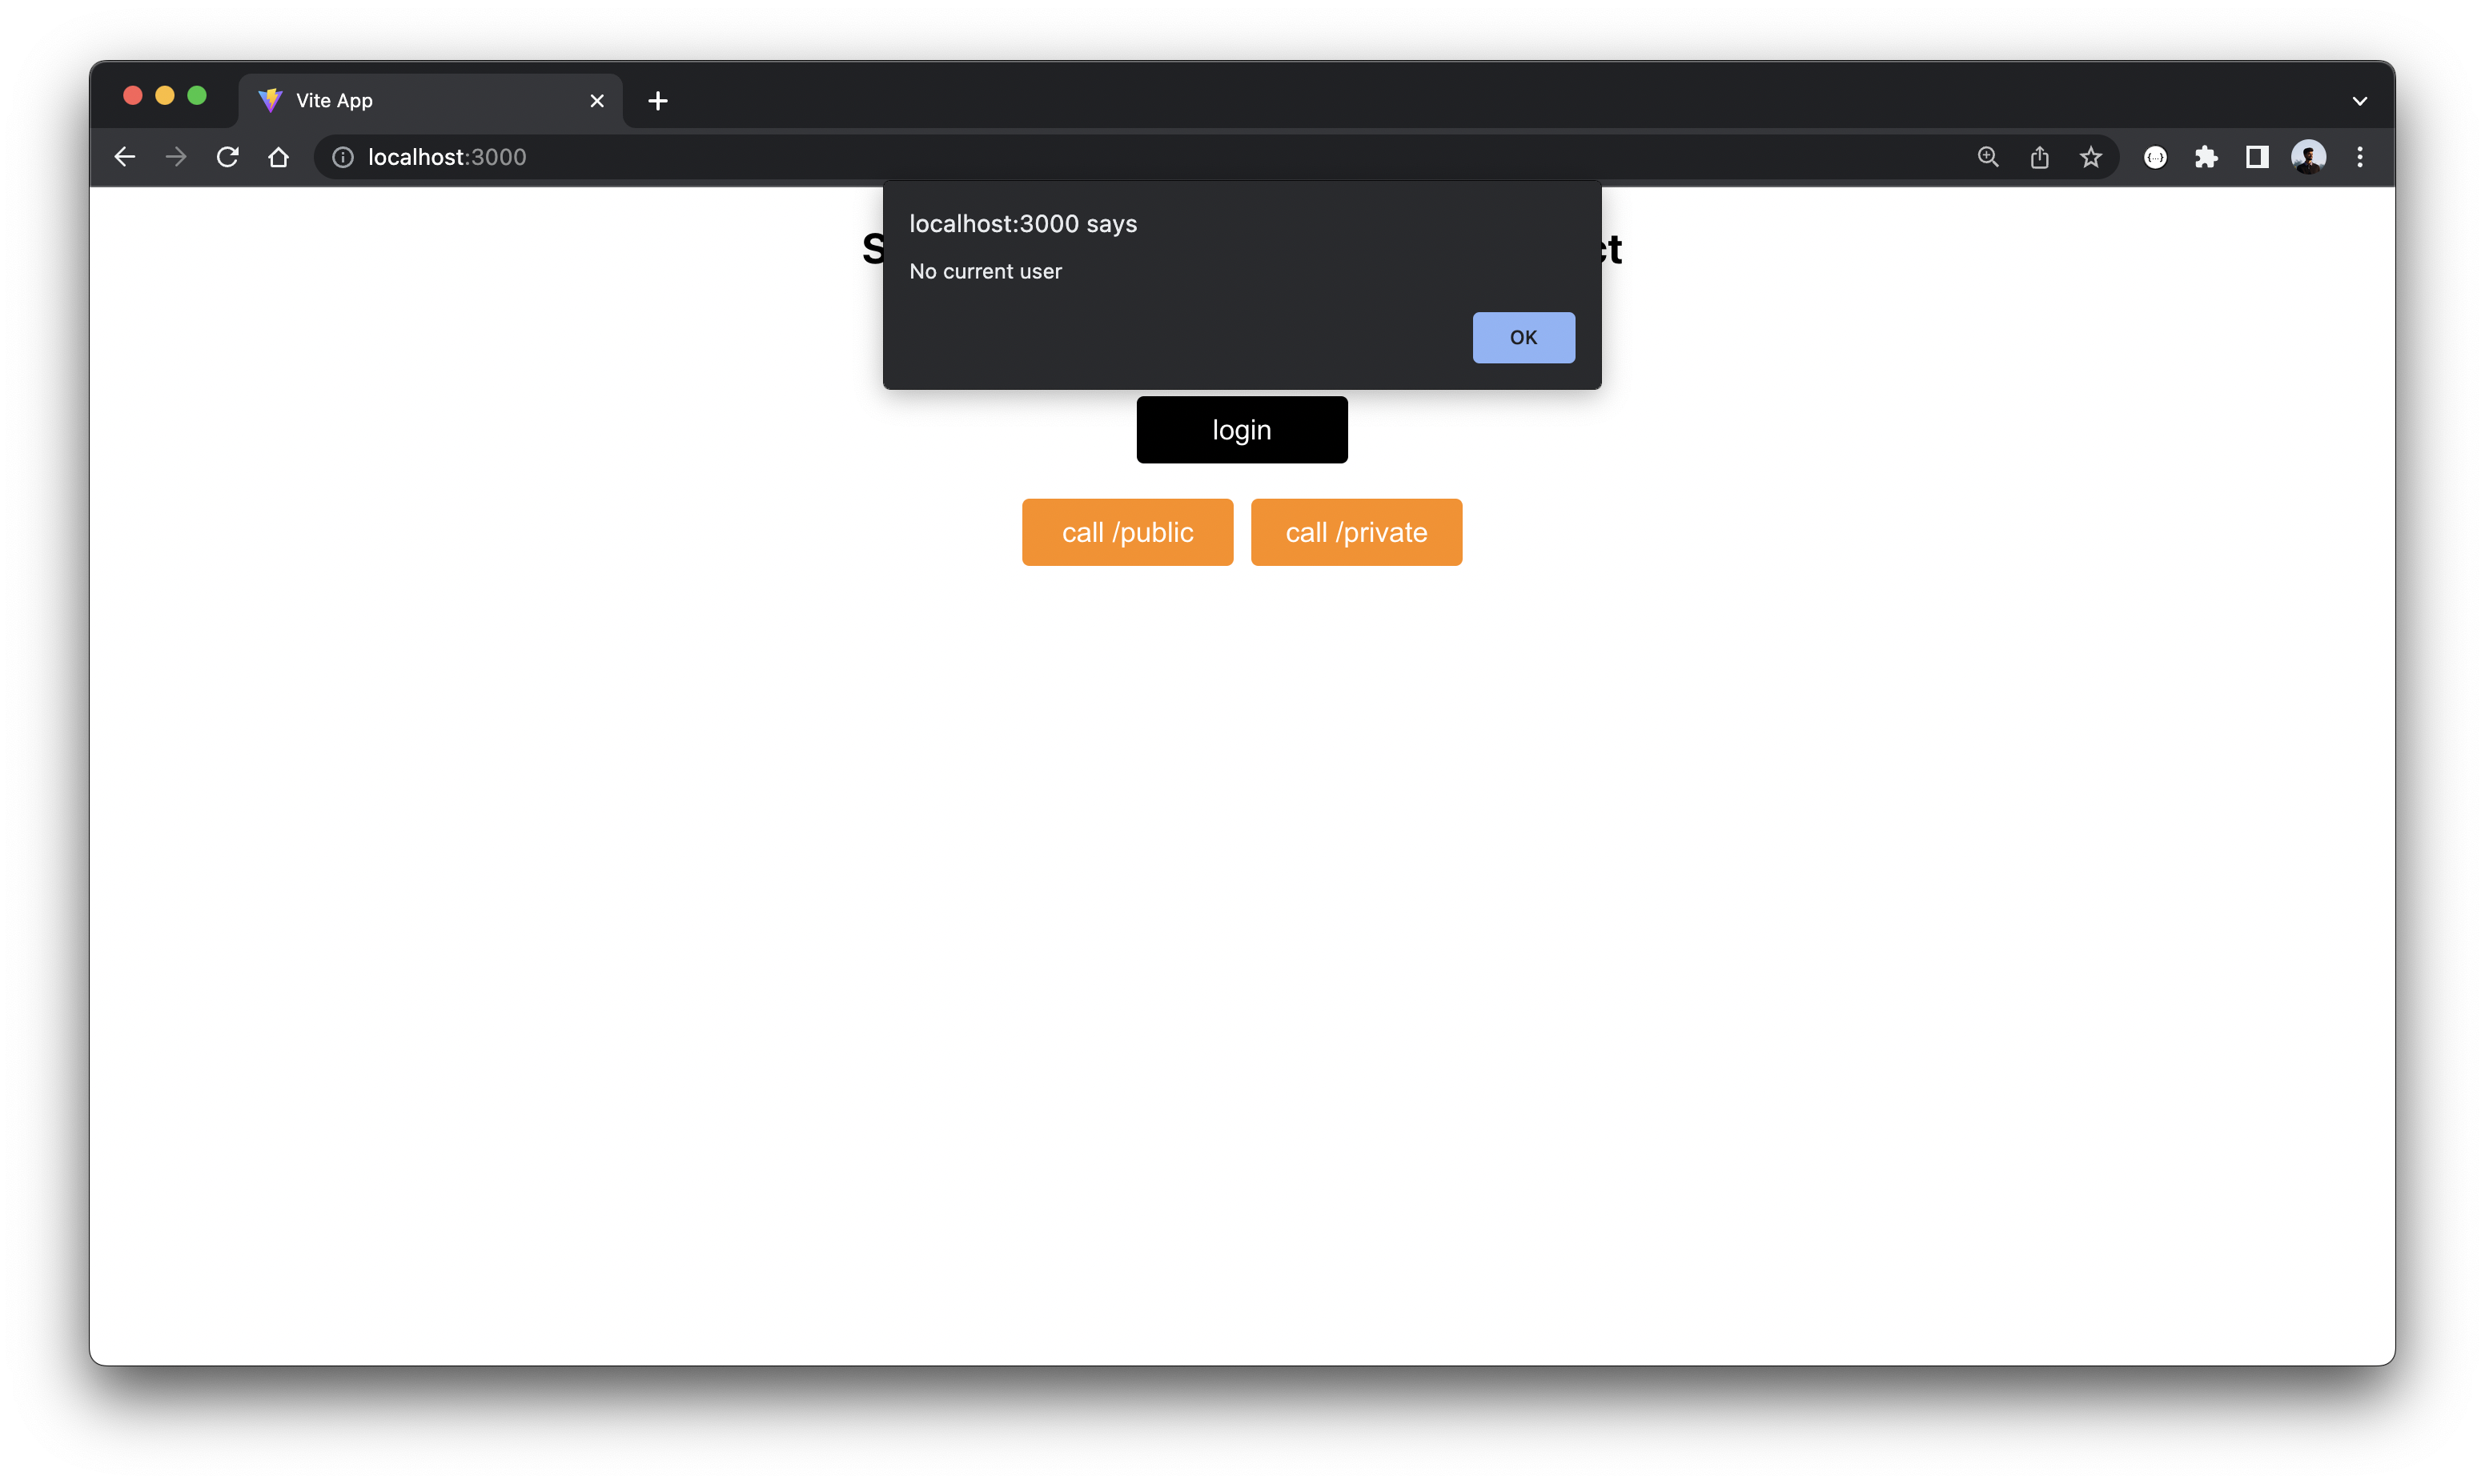
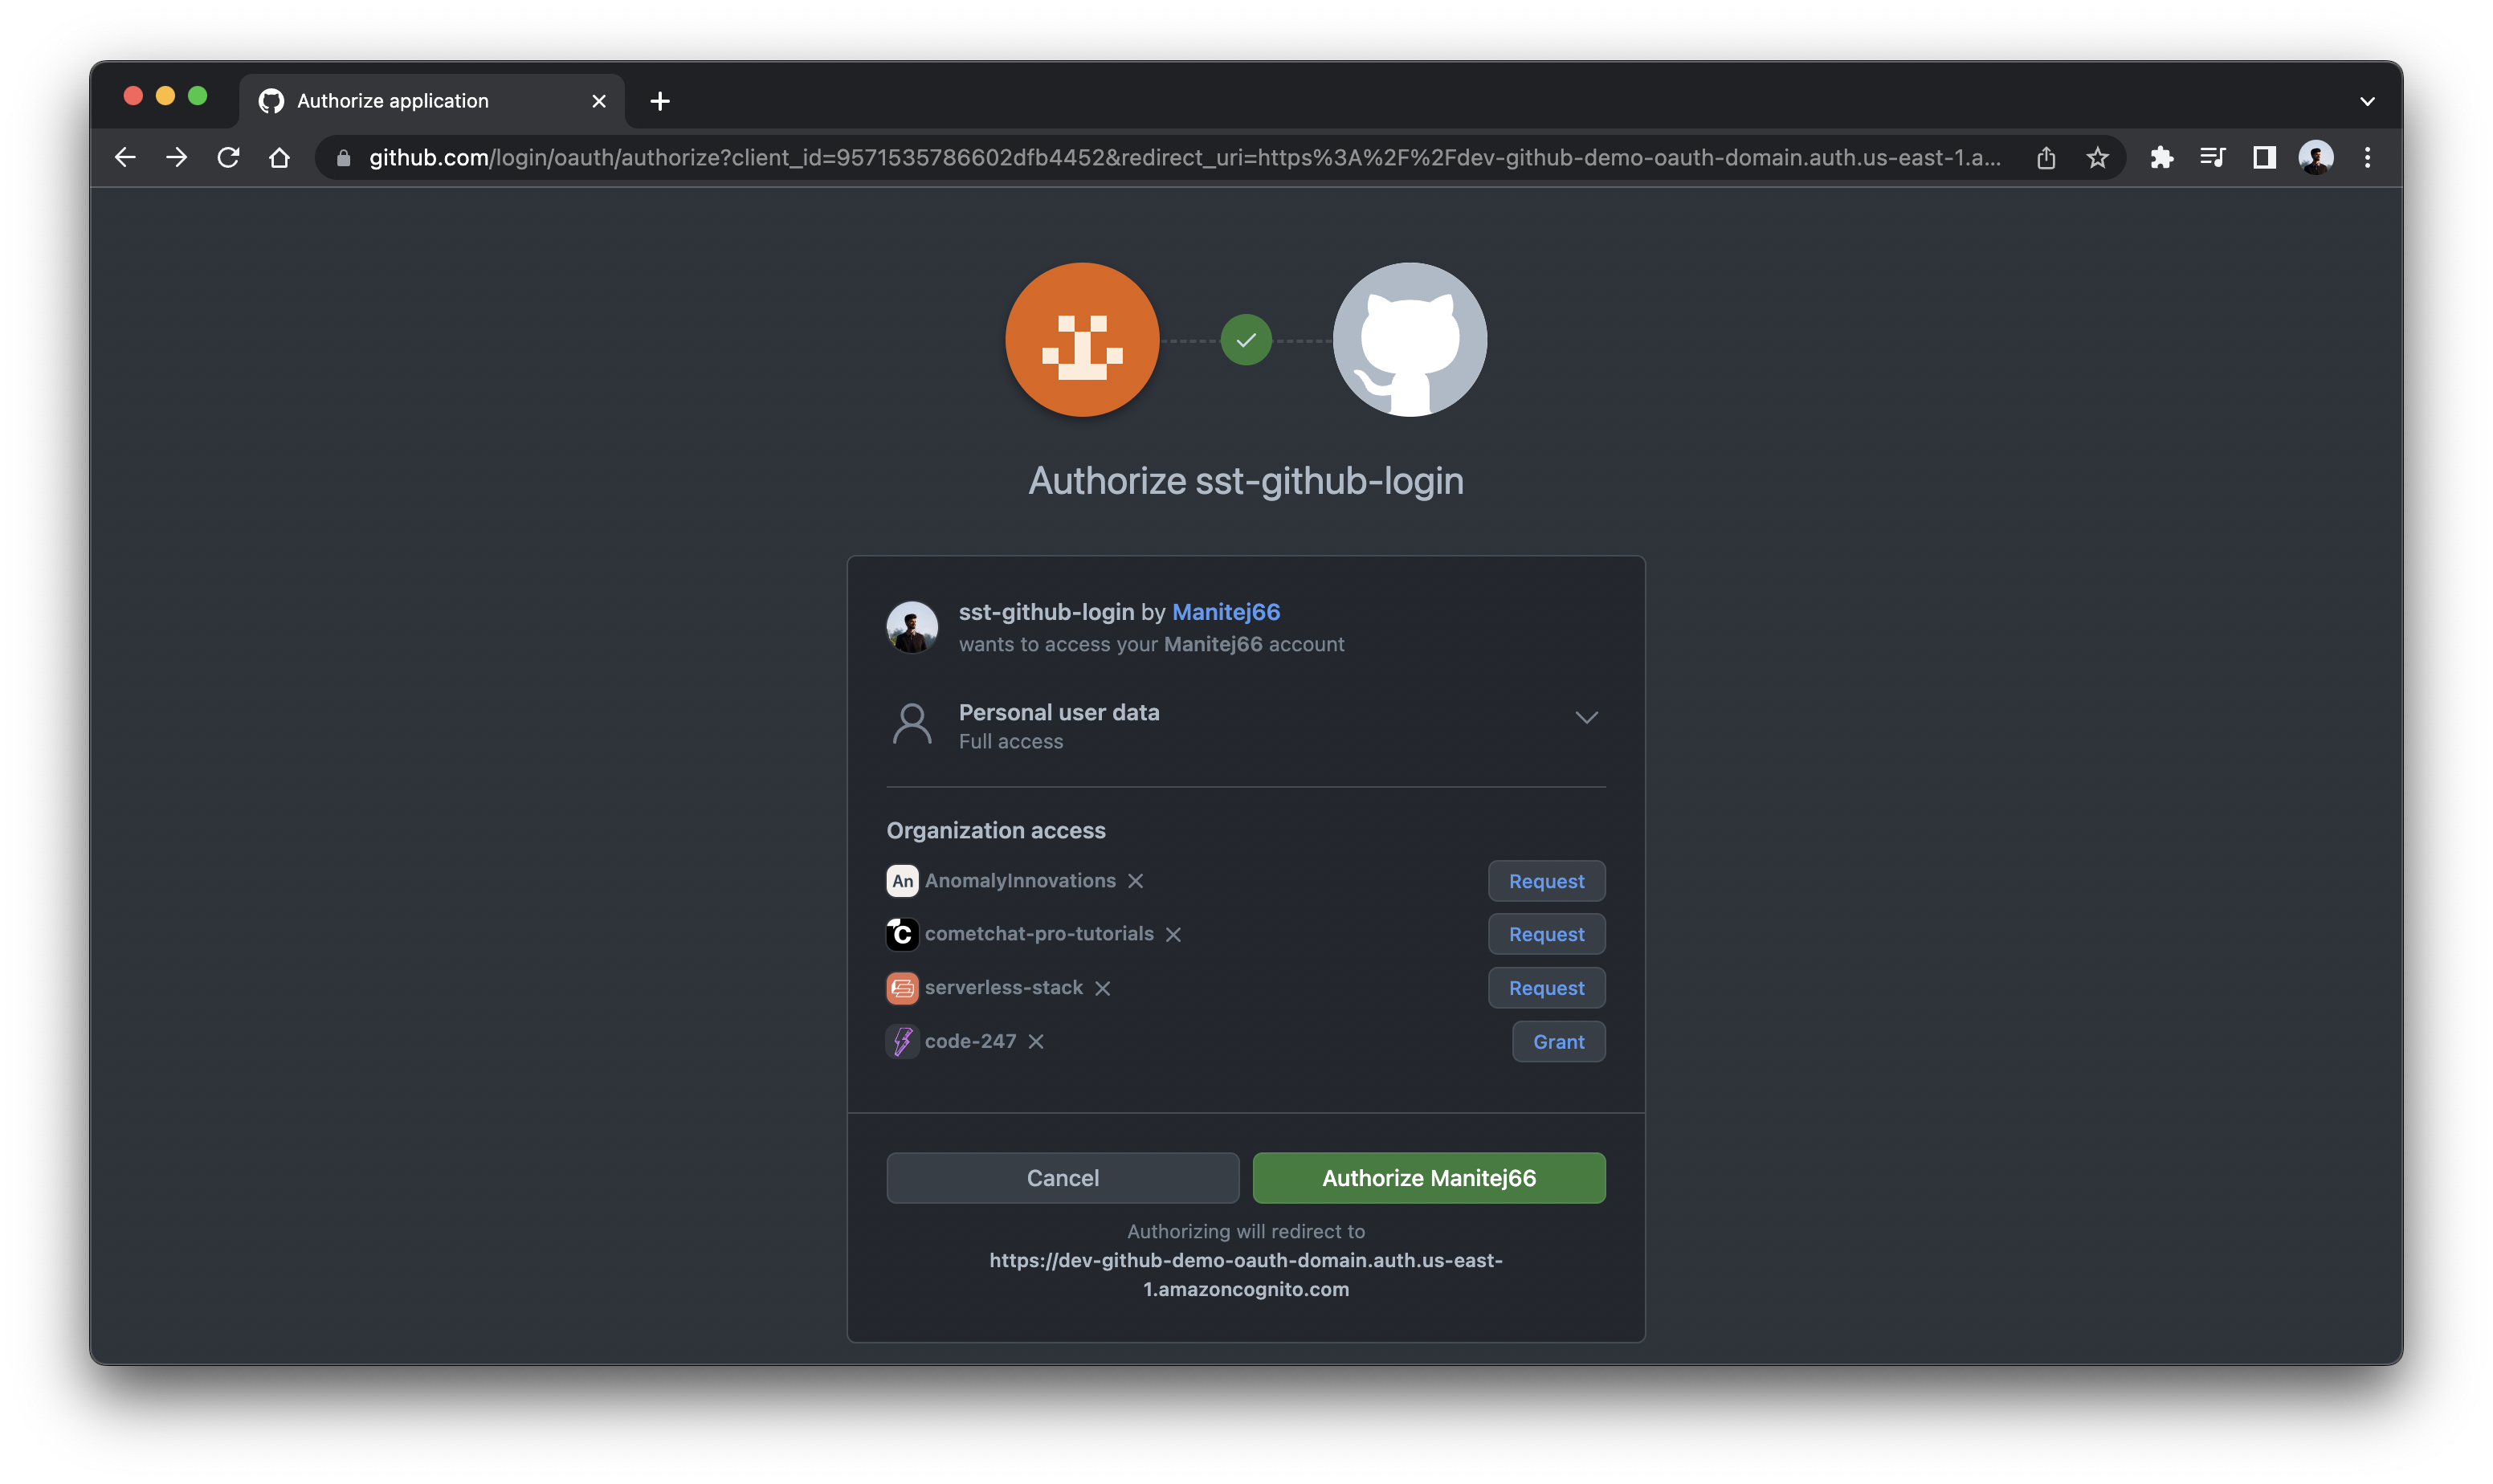
Once you click on login, you’re asked to login through your GitHub account.
Once it’s done you can check your info.
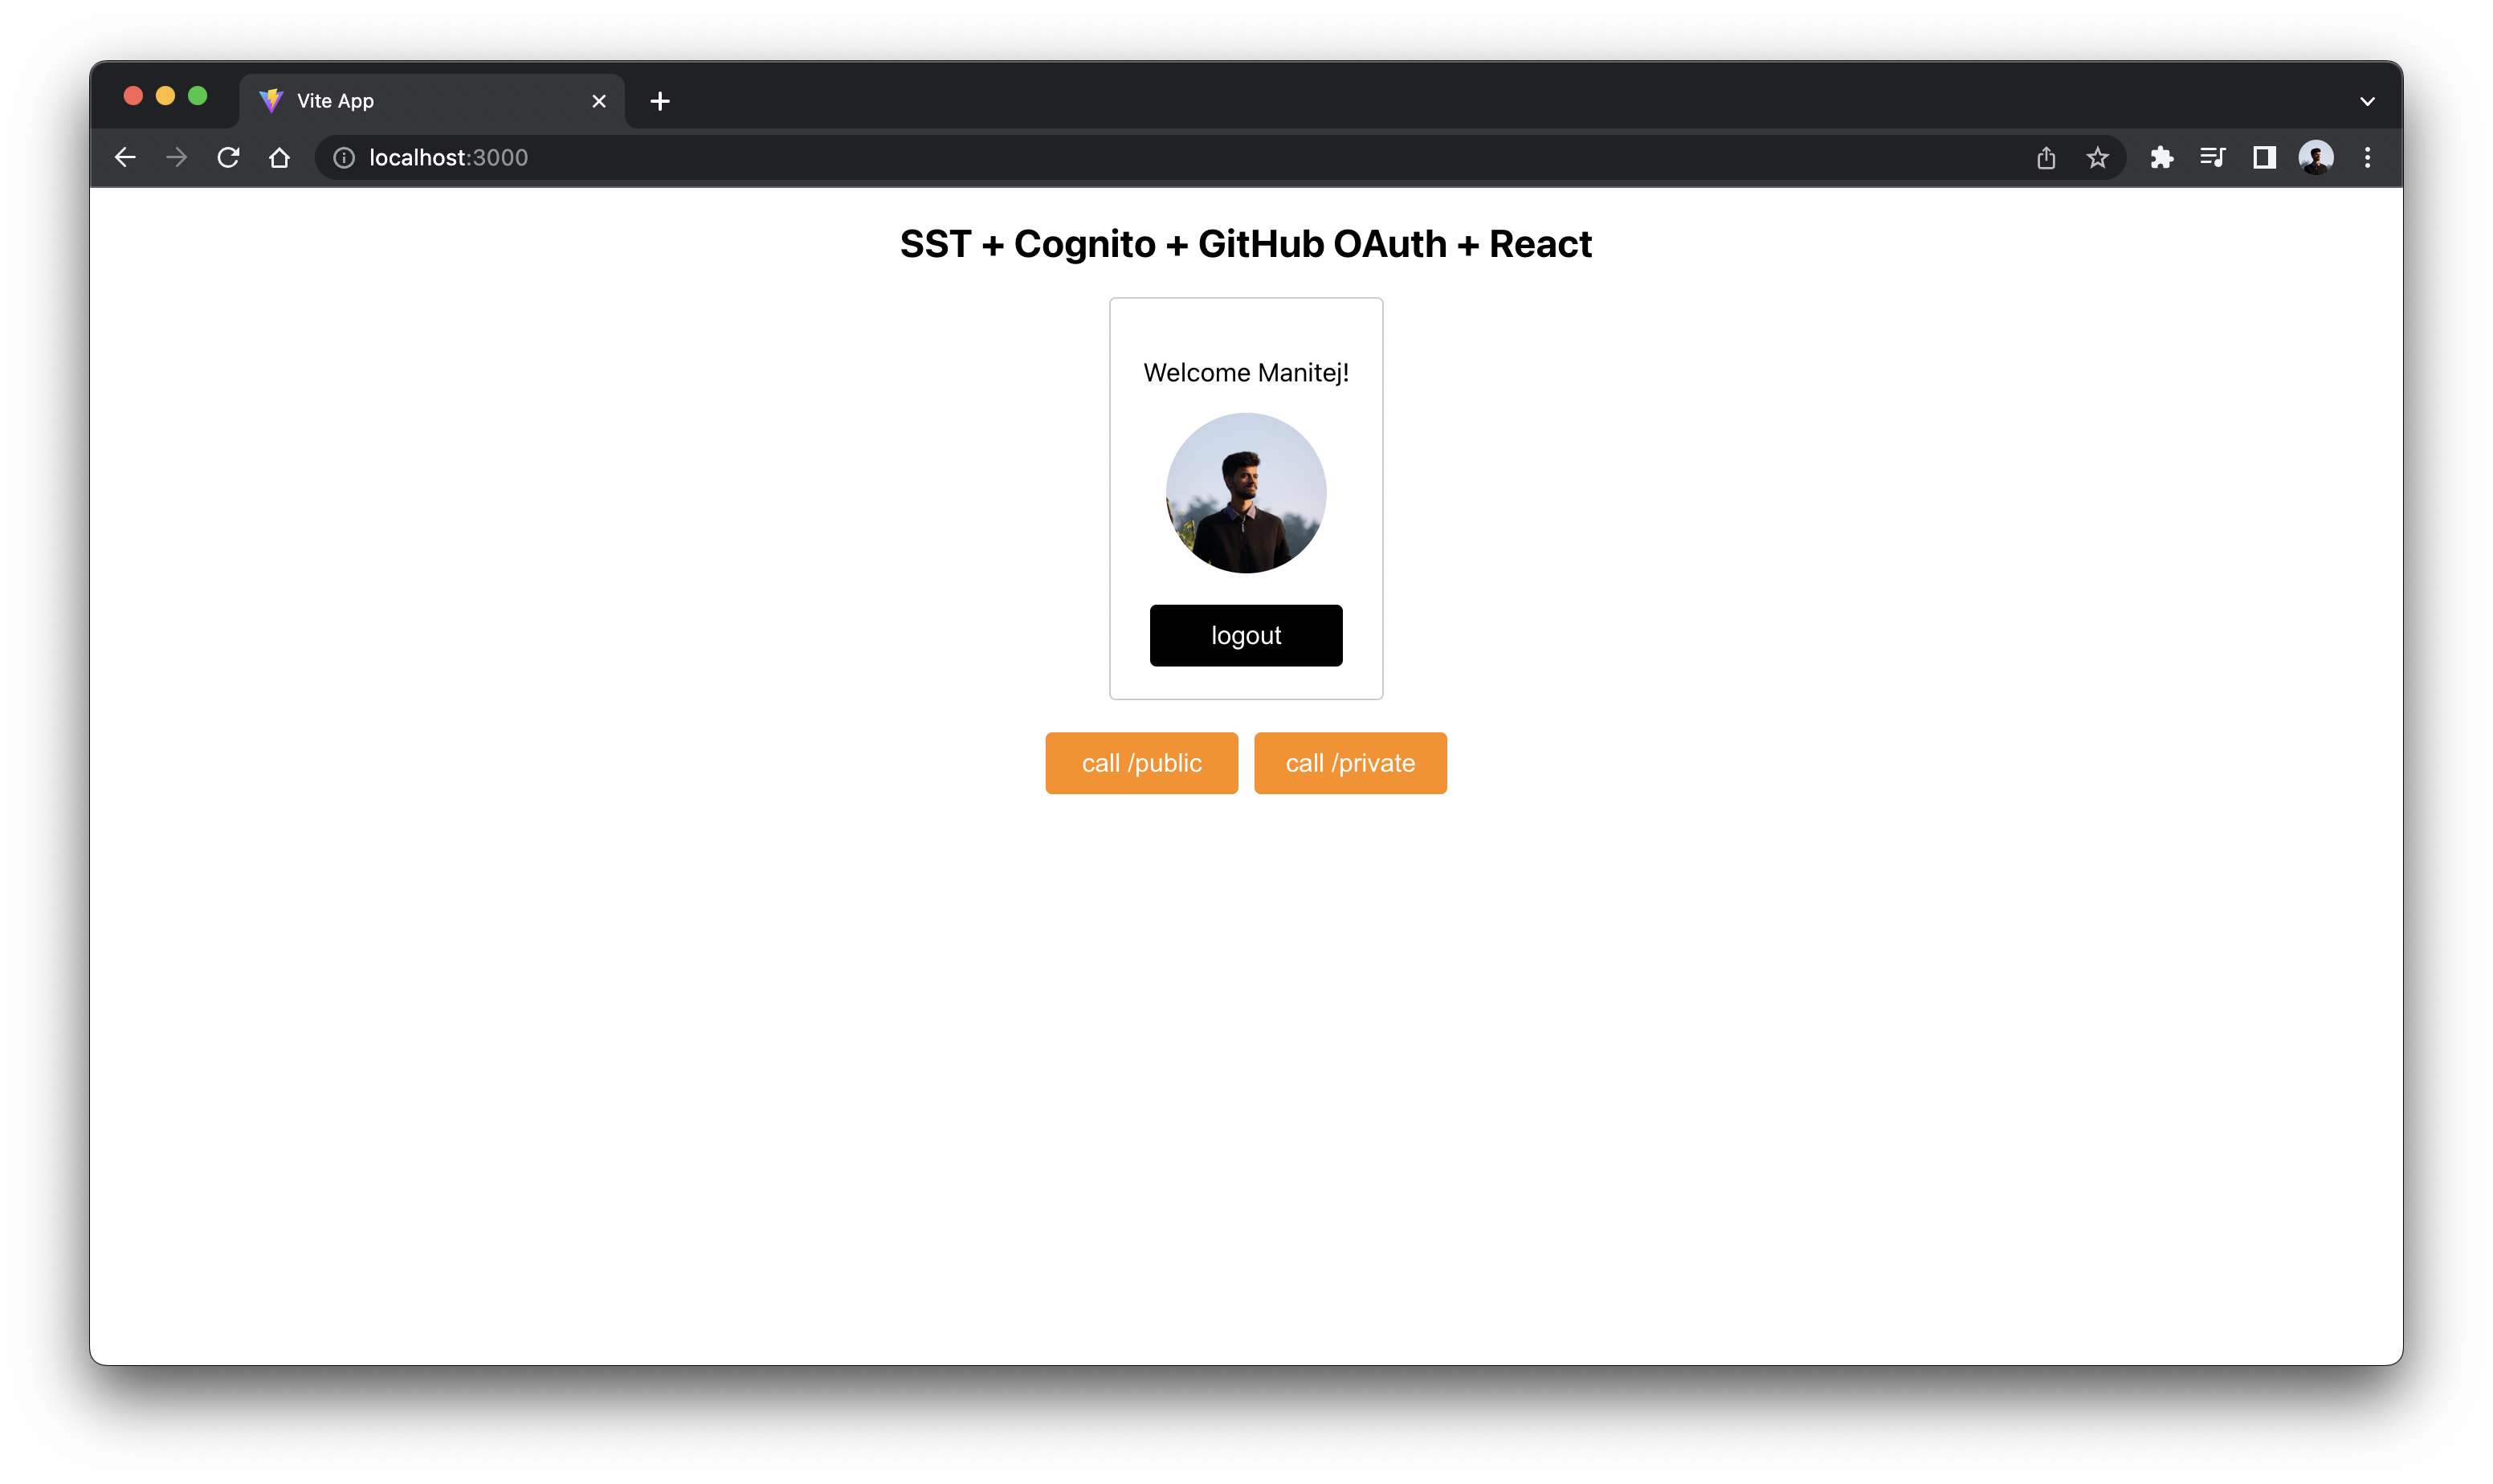
Now that you’ve authenticated repeat the same steps as you did before, you’ll see responses like below.
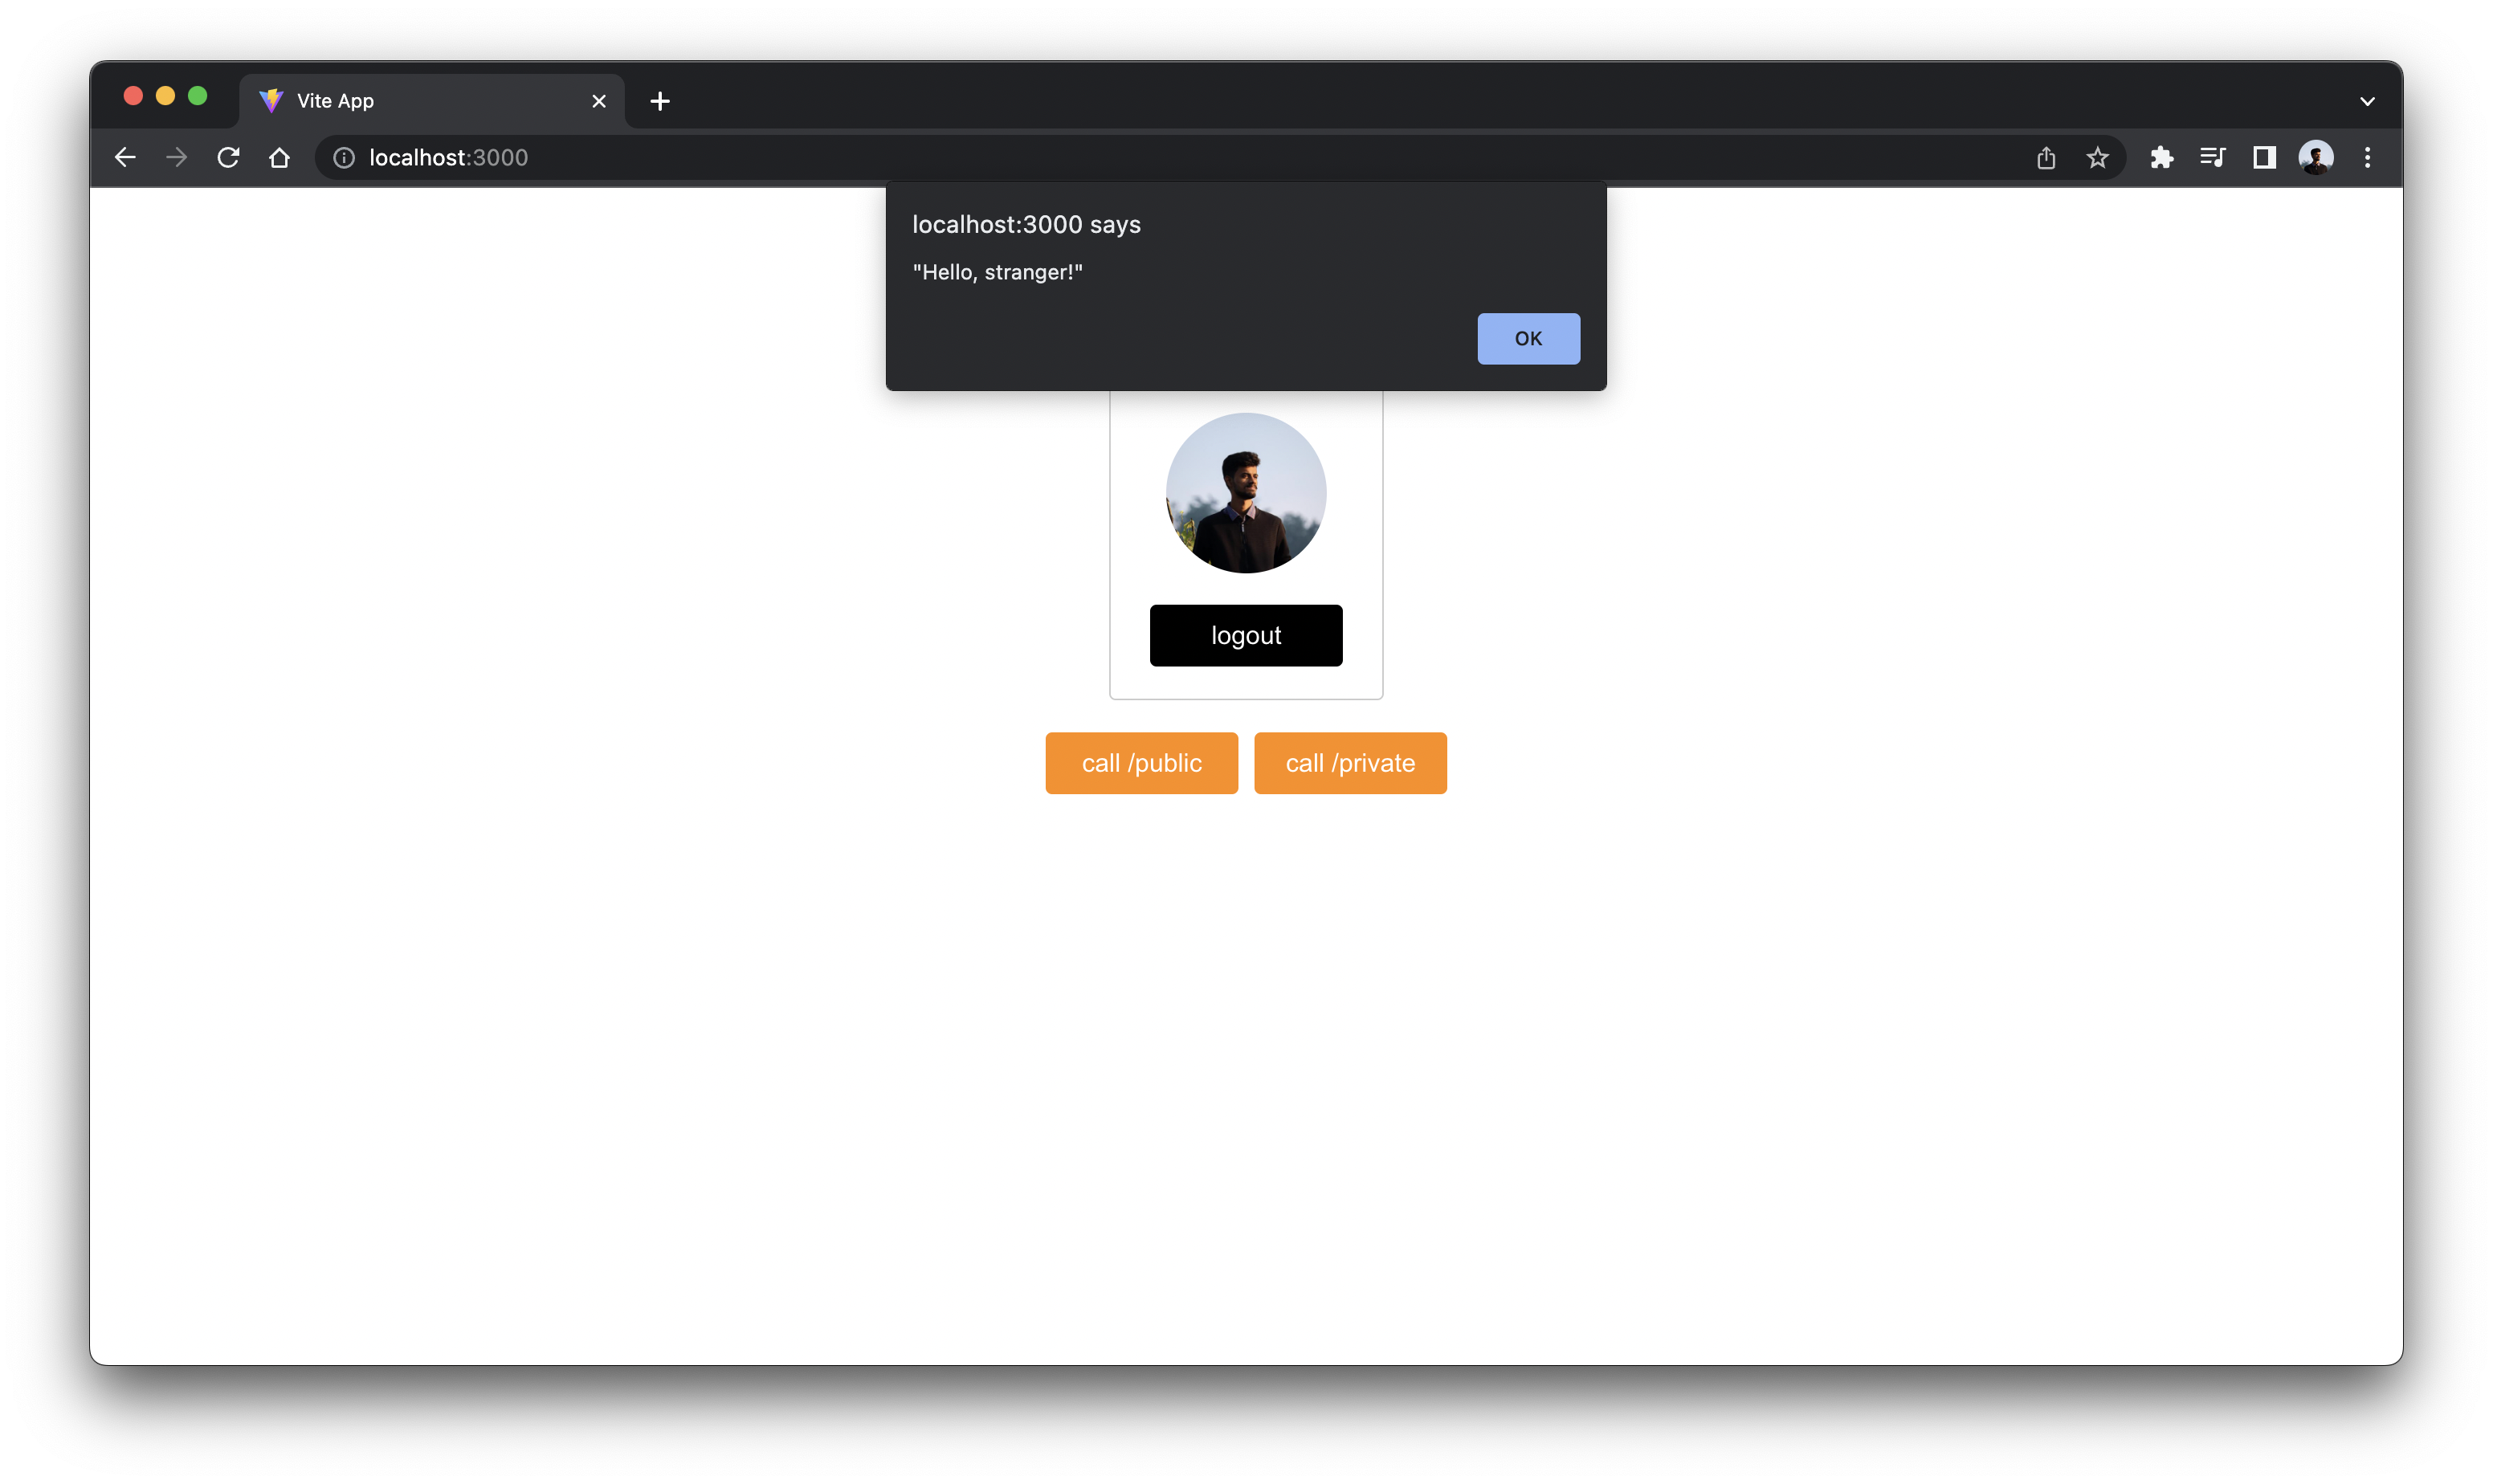
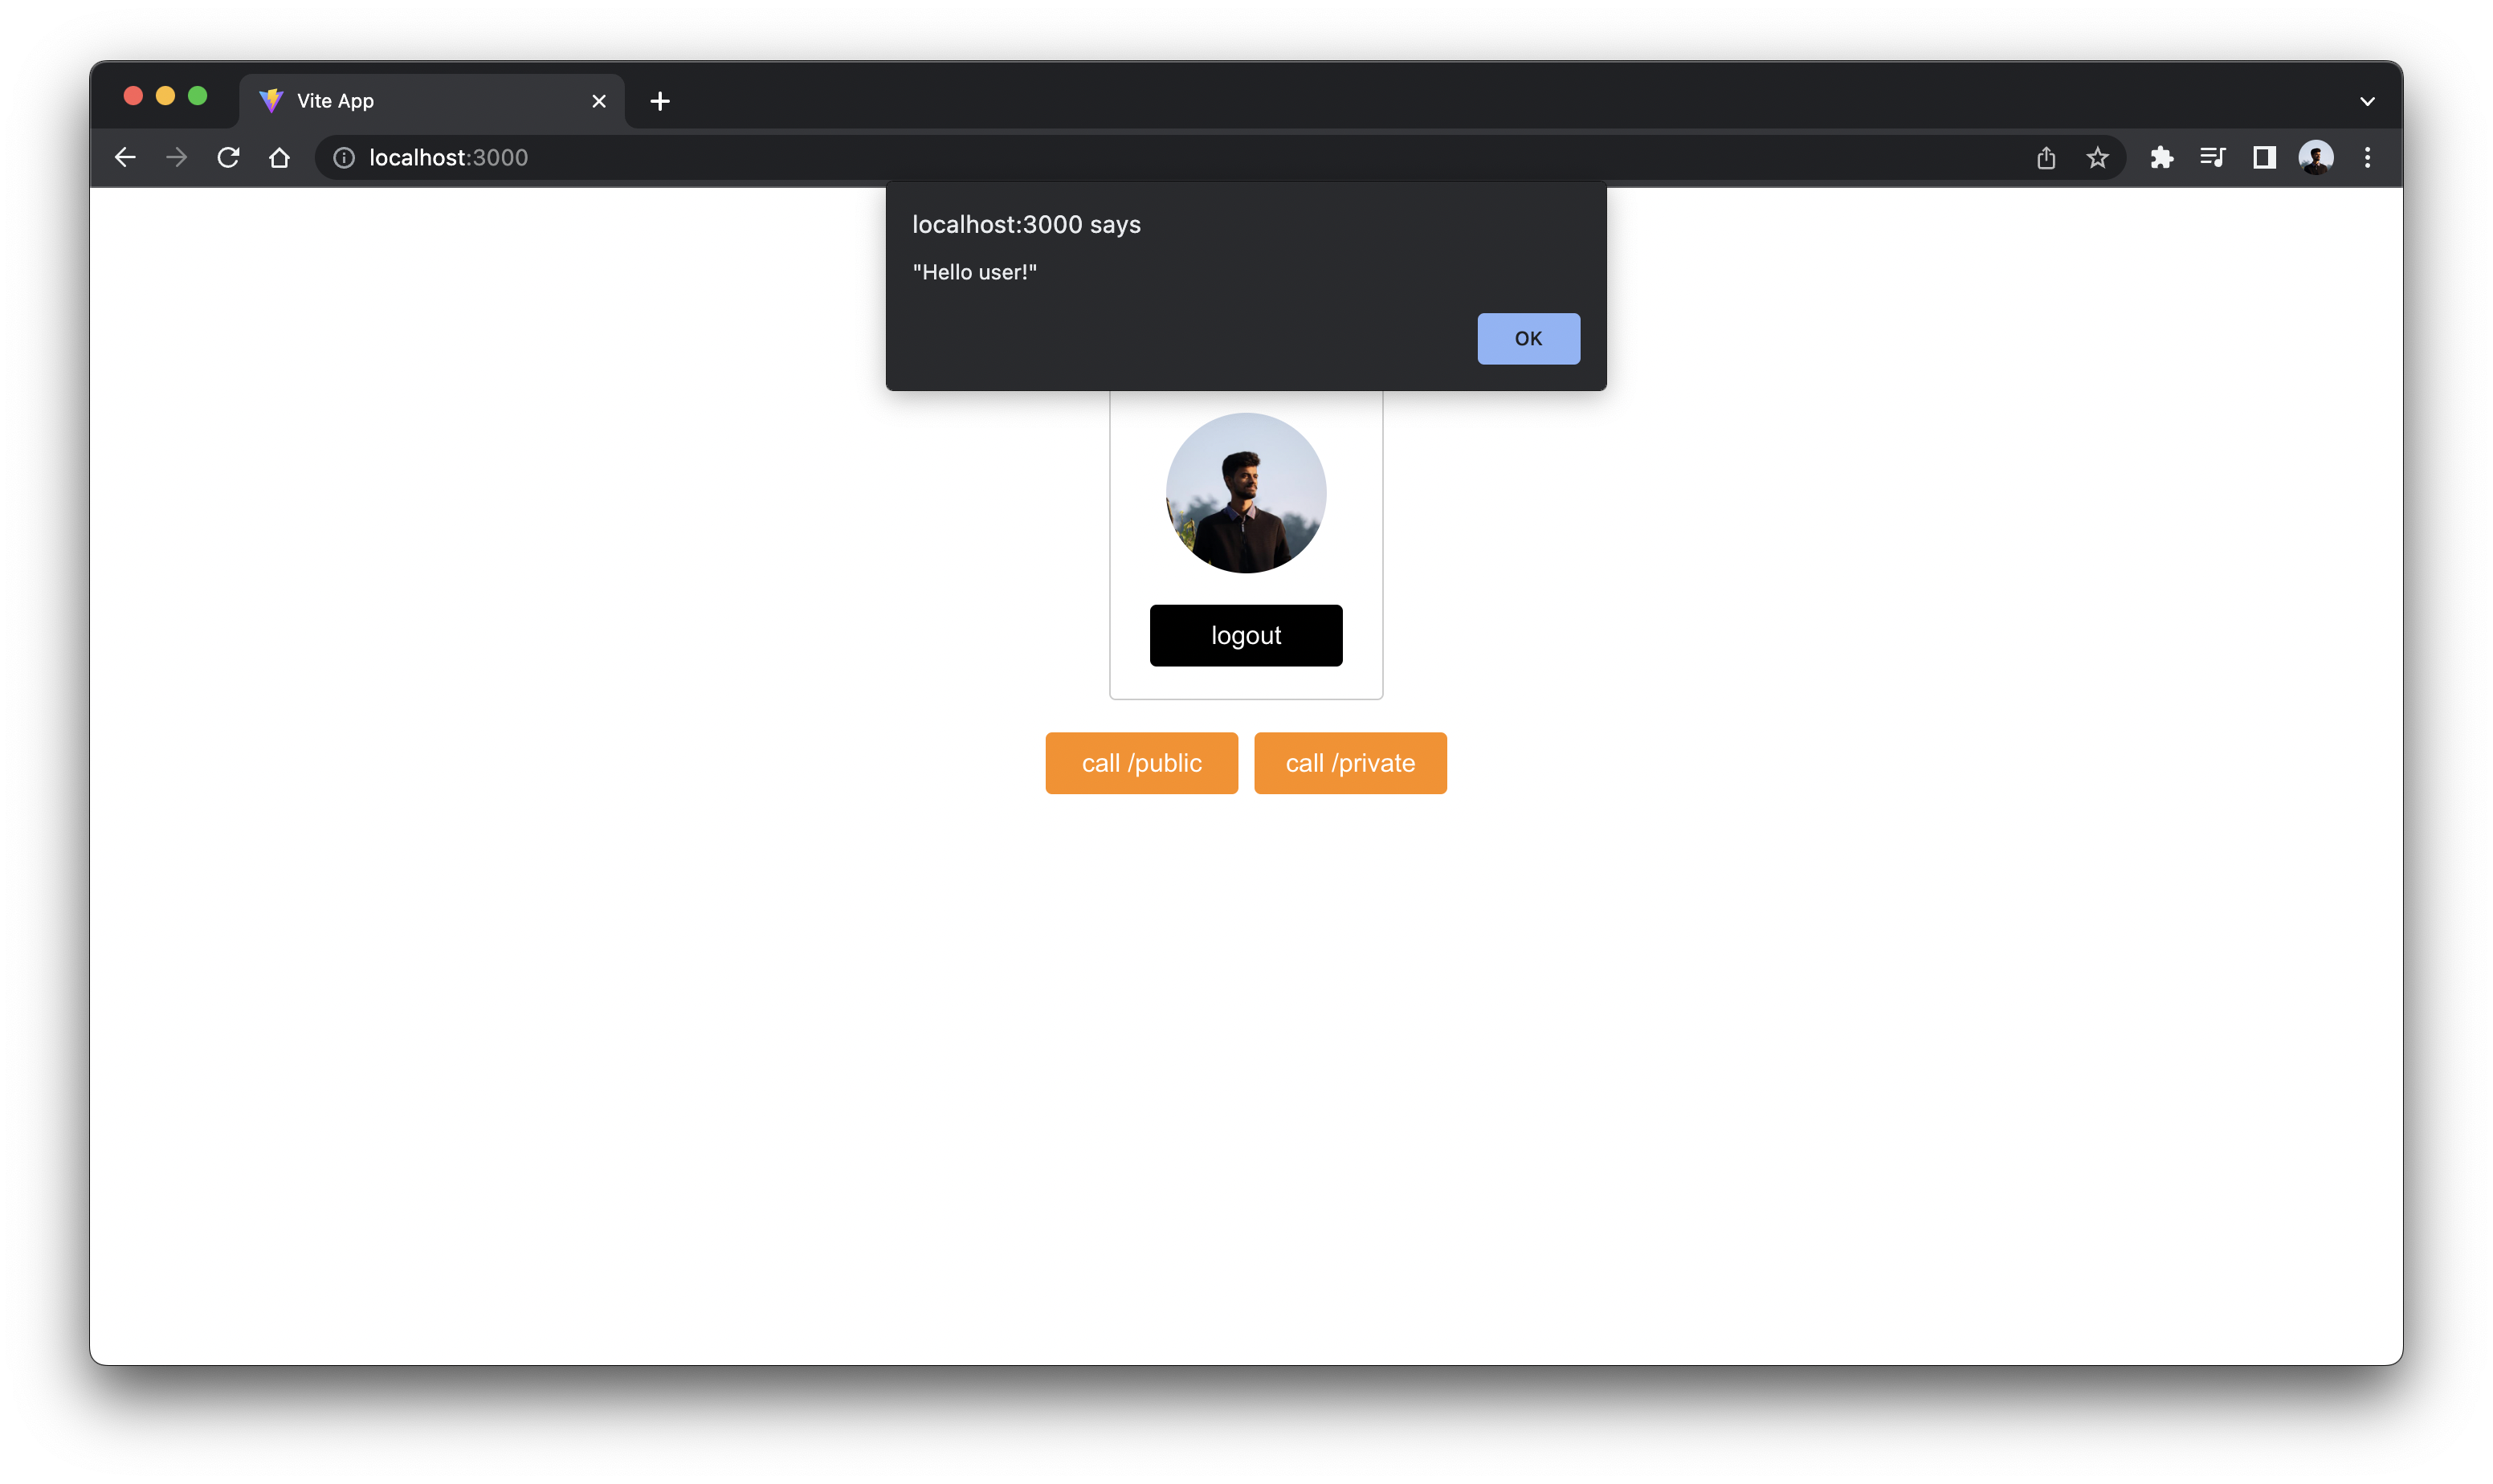
As you can see the private route is only working while we are logged in.
Deploying your API
 To wrap things up we’ll deploy our app to prod.
$ npx sst deploy --stage prod
This allows us to separate our environments, so when we are working in dev, it doesn’t break the app for our users.
Once deployed, you should see something like this.
 ✅  prod-api-oauth-github-ExampleStack


Stack prod-api-oauth-github-ExampleStack
  Status: deployed
  Outputs:
    api_url: https://v0l0zspdd7.execute-api.us-east-1.amazonaws.com
    auth_client_id: e58t1t5o6jjur88nu4t891eac2
    auth_domain: prod-demo-auth-domain
    site_url: https://d1567f41smqksw.cloudfront.net
Cleaning up
Finally, you can remove the resources created in this example using the following command.
$ npx sst remove
And to remove the prod environment.
$ npx sst remove --stage prod
Conclusion
And that’s it! You’ve got a brand new serverless API authenticated with GitHub. A local development environment, to test. And it’s deployed to production as well, so you can share it with your users. Check out the repo below for the code we used in this example. And leave a comment if you have any questions!
Example repo for reference
github.com/sst/sst/tree/master/examples/api-oauth-githubFor help and discussion
Comments on this exampleMore Examples
APIs
-
REST API
Building a simple REST API.
-
WebSocket API
Building a simple WebSocket API.
-
Go REST API
Building a REST API with Golang.
-
Custom Domains
Using a custom domain in an API.
Web Apps
-
React.js
Full-stack React app with a serverless API.
-
Next.js
Full-stack Next.js app with DynamoDB.
-
Vue.js
Full-stack Vue.js app with a serverless API.
-
Svelte
Full-stack SvelteKit app with a serverless API.
-
Gatsby
Full-stack Gatsby app with a serverless API.
-
Angular
Full-stack Angular app with a serverless API.
Mobile Apps
GraphQL
Databases
-
DynamoDB
Using DynamoDB in a serverless API.
-
MongoDB Atlas
Using MongoDB Atlas in a serverless API.
-
PostgreSQL
Using PostgreSQL and Aurora in a serverless API.
-
CRUD DynamoDB
Building a CRUD API with DynamoDB.
-
PlanetScale
Using PlanetScale in a serverless API.
Authentication
Using SST Auth
-
Facebook Auth
Adding Facebook auth to a full-stack serverless app.
-
Google Auth
Adding Google auth to a full-stack serverless app.
Using Cognito Identity Pools
-
Cognito IAM
Authenticating with Cognito User Pool and Identity Pool.
-
Facebook Auth
Authenticating a serverless API with Facebook.
-
Twitter Auth
Authenticating a serverless API with Twitter.
-
Auth0 IAM
Authenticating a serverless API with Auth0.
Using Cognito User Pools
-
Cognito JWT
Adding JWT authentication with Cognito.
-
Auth0 JWT
Adding JWT authentication with Auth0.
-
Google Auth
Authenticating a full-stack serverless app with Google.
-
Facebook Auth
Authenticating a full-stack serverless app with Facebook.
Async Tasks
-
Cron
A simple serverless Cron job.
-
Queues
A simple queue system with SQS.
-
Pub/Sub
A simple pub/sub system with SNS.
-
Resize Images
Automatically resize images uploaded to S3.
-
Kinesis data streams
A simple Kinesis Data Stream system.
-
EventBus
A simple EventBridge system with EventBus.
Editors
-
Debug With VS Code
Using VS Code to debug serverless apps.
-
Debug With WebStorm
Using WebStorm to debug serverless apps.
-
Debug With IntelliJ
Using IntelliJ IDEA to debug serverless apps.
Monitoring
Miscellaneous
-
Lambda Layers
Using the @sparticuz/chromium layer to take screenshots.
-
Middy Validator
Use Middy to validate API request and responses.